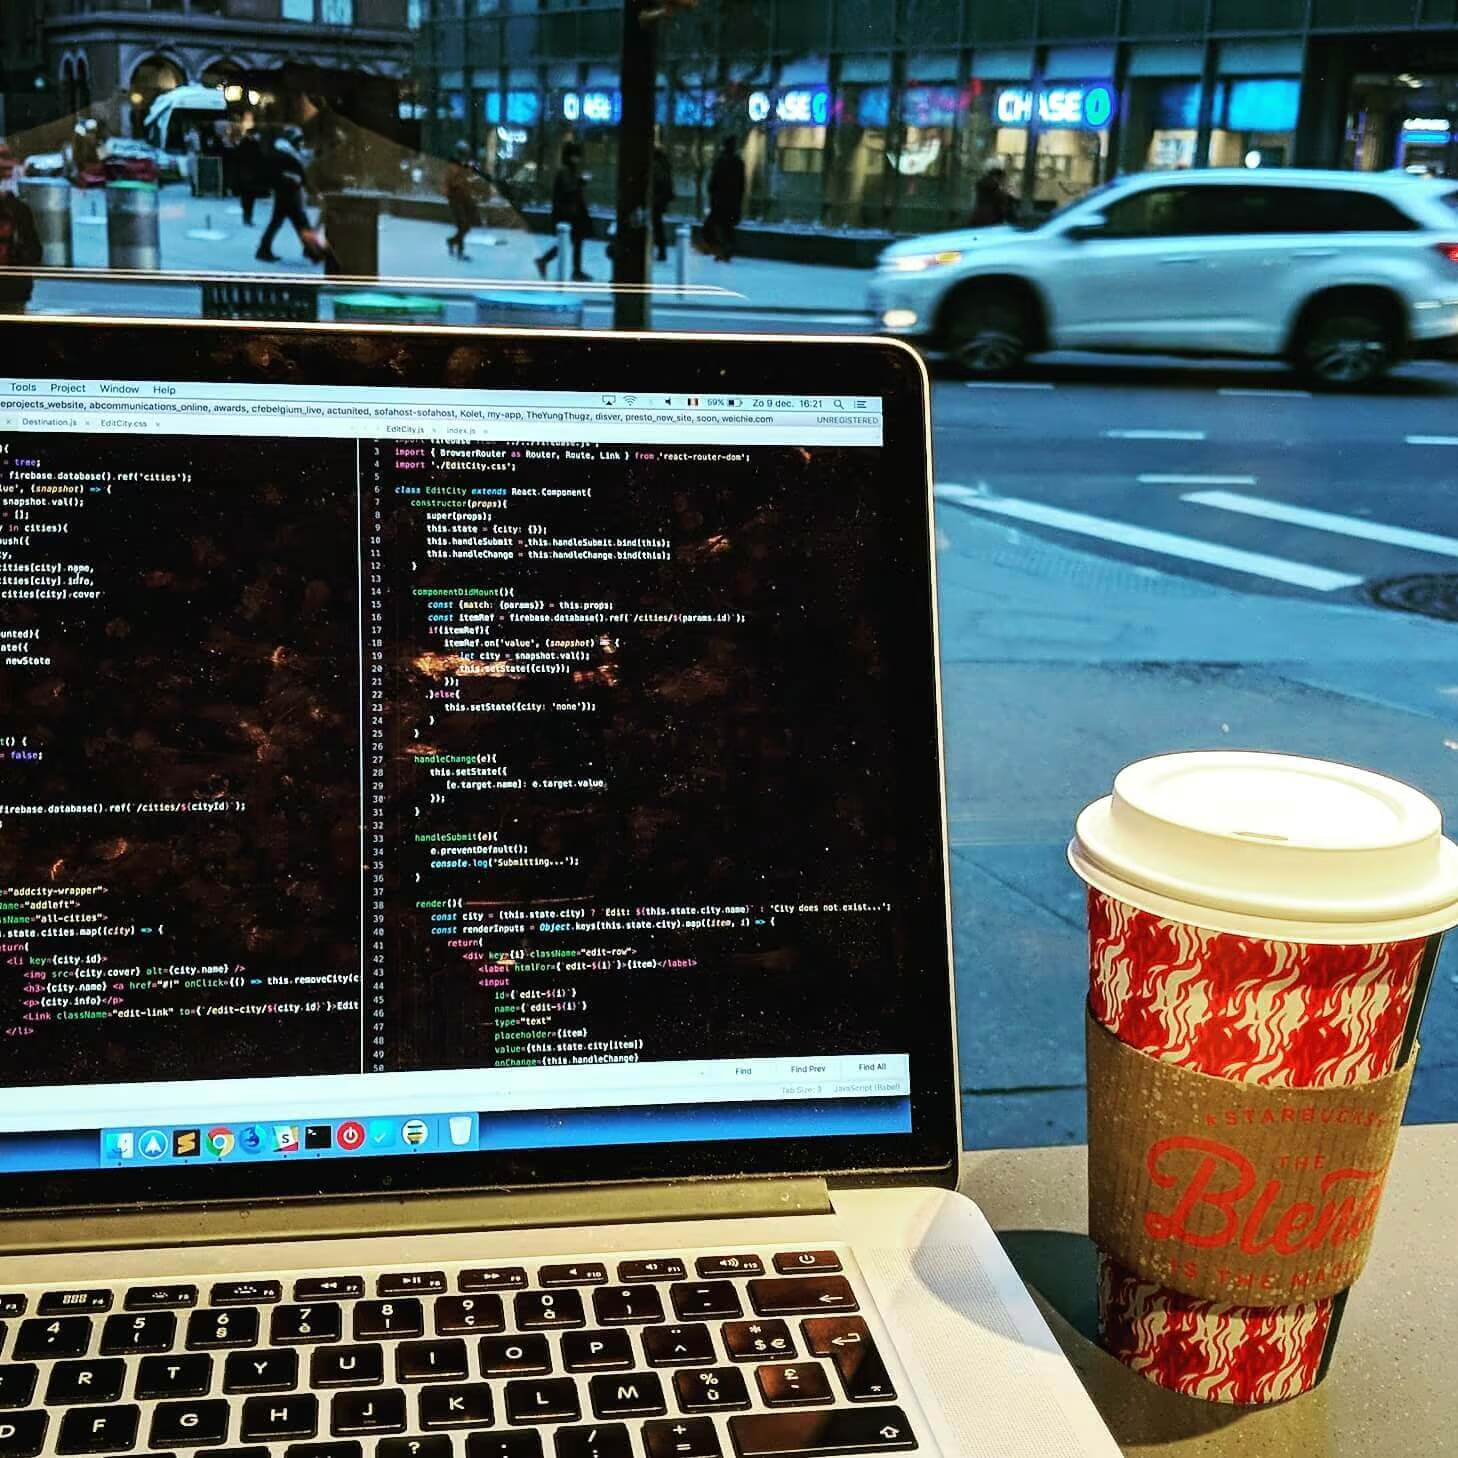
I want to start creating apps with React, and what better way to do this than with a real-time application that other people can use? Making ‘real’ stuff, gives me more motivation to start learning new things. I’ll be building a React Chat application with firebase and will blog along the way, to let you know how I did it and where I struggled. Hopefully it can help you getting started with React or Firebase as well!
Project Setup
You can see a live demo of this application here: https://chat.weichie.com (no longer available). You need to register an account first before you can see the chat. I did not put any effort into styling.
The GIT Repo of this project can be found here: https://github.com/weichie/react-firebase-chat. Feel free to have a look around!
PART 2 IS FINALLY HERE! Make sure to check it out once you’ve finished part 1 of course.
I am just starting out with React myself as well, so if you are an advanced React user, this blog probably can’t help you. But feel free to leave a comment with suggestions or feedback! Assuming you have basic knowledge of ES6 and React, I’ll be using the create-react-app, firebase, and react-router npm packages. So no redux or any other fancy library.
Let’s get started!
First let’s create our new react project!
create-react-app chatboxAfter this is installed, manually browse to this folder and take a look at the /src folder. There’s a bunch of files that I personally do not like, so I’m removing all files in this folder EXCEPT the index.js and index.css files! Before we’ll start, we also add the react-router and firebase packages to our project:
npm i react-router
npm i react-router-dom
npm i firebase
Now that all our dependencies are installed, we can go ahead and creating our folder structure. We need a ‘homepage’, where all our chats will be displayed. And an Auth folder that will have all our views for authentication, like user registration and login etc… We’ll create a /components folder inside the default /src folder. Afterwards, inside /components we’ll create a /Home and a /Auth folder. Our Home folder will have a Home.js and a Home.css file. The Auth folder will have an Auth.css, Register.js and Login.js file. Here’s my folder structure:
- node_modules
- package-lock.json
- package.json
- public
- README.md
- src
    - components
        - Home
            - Home.js
            - Home.css
        - Auth
            - Auth.css
            - Login.js
            - Register.js
        - index.css
        - index.js
- yarn.lock
Let’s fire up our local server to see what we have so far! I’m using Yarn, but create-react-app will tell you in the terminal what commands are available for you if you don’t have yarn installed. Make sure you are in the root of your project before you run the command.
yarn startOnce the pages is loaded, we should see an error. (as I removed App.js to cleanup my project). So let’s start building our Home.js component:
// /components/Home/Home.js
import React from 'react';
import './Home.css';
class Home extends React.Component{
	render(){
		return(
			<div className="home--container">
				<h1>Home Container</h1>
			</div>
		);
	}
}
export default Home;
We’ll just add a <h1> for now, to see if our component is working. After this, we need to include our fresh home component into our index.js file, to make sure we’re launching the Home component instead of the previous App component (that we removed).
// index.js
import React from 'react';
import ReactDOM from 'react-dom';
import './index.css';
import Home from './components/Home/Home';
ReactDOM.render(<Home />, document.getElementById('root'));
If we navigate to our project now, we should be able to see our ‘Home Container’ h1 element on the page. We’ll copy the code from our Home component also to our Auth components, to make sure they all work fine. So we have something to look at while we implement our React-Router.
Copy the Home.js code to the /Auth/Login.js and Register.js so we can start navigating through our different components. Just change the classname of the projects (obviously) and the title. So we can actually see when we change views. After that, import our Auth components into our index.js file as well to finish our project setup.
// index.js
...
import Login    from './components/Auth/Login';
import Register from './components/Auth/Register';
...
Implementing React Router
Now that we have all our components, let’s hook up React Router first, before we actually start implementing Firebase and Authentication. If you didn’t have react-router and react-router-dom installed in your project already, please go ahead and do so. If you have it, let’s edit our index.js file with react-router.
First, import BrowserRouter from the react-router-dom:
import { BrowserRouter as Router, Route, Link, Switch } from 'react-router-dom';Afterward, let’s create a Router component inside our index.js. This looks like a regular React Component like we did for Home and our Auth.
class AppRouter extends React.Component{
	render(){
		return(
			/* ... router code here ... */
		);
	}
}
We’ll add our Routercode in a second. For now, let’s switch out our <Home /> component with our new <AppRouter /> component to make sure we’re displaying the correct component at startup.
ReactDOM.render(
	<AppRouter />,
	document.getElementById('root')
);
Ok, time to build our router inside our previously created AppRouter component! The Router component only accepts 1 child. So we’ll wrap everything in a parent-div:
// index.js
...
class AppRouter extends React.Component{
	render(){
		return(
			<Router>
				<div className="app">
					<nav className="main-nav">
						<Link to="/">Home</Link>
						<Link to="/login">Login</Link>
						<Link to="/register">Register</Link>
					</nav>
					<Switch>
						<Route path="/" exact component={Home} />
						<Route path="/login" exact component={Login} />
						<Route path="/register" exact component={Register} />
						<Route component={NoMatch} />
					</Switch>
				</div>
			</Router>
		);
	}
}
...
We’ll use the <nav> element to display our navigation, so we’re able to navigate through our different views. Instead of <a href=””> elements, we need to use <Link to=””> elements. ReactRouter will automatically render these into normal <a href=””> tags once it’s in the browser.
Also notice we’re using the Switch component to create our routes. Here we can say that if the URL of the page is equal to /login, then render the Login component. Notice I use a {NoMatch} default Route, that we will be using for 404-pages. here’s the function for the NoMatch if you want to use this too. Place it right under our AppRouter component:
const NoMatch = ({location}) => No route match for {location.pathname};Implementing Firebase
Before we can continue with our authentication, we’ll need to link firebase first. Head over to firebase.com and create a new database. After creating the new database, you should be able to see next screen: Click on the web icon to receive your web access tokens.
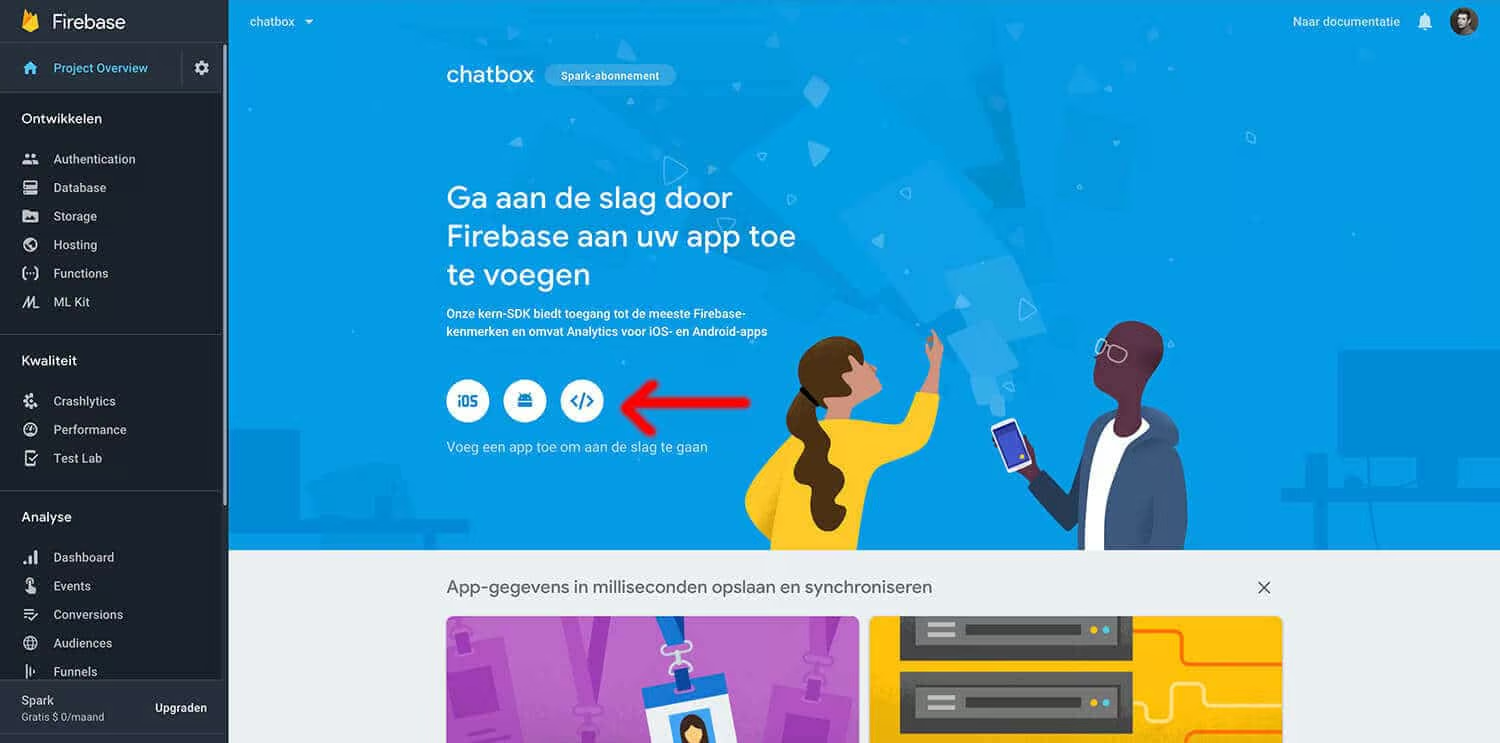
This will open a popup with all the data you need. Copy all of it, because we’ll need it in a second. If you have not installed the firebase npm package yet, please go ahead and do so. If you have it already, create a new file named firebase.js in our /src folder and paste the firebase snipped we just copied in there. Your firebase.js file will look like this:
// firebase.js
import firebase from 'firebase';
const config = {
  apiKey: "xxxxxxxxxx-xxxx-xxxx_xxxxxxxxxx_xxxxxxx",
  authDomain: "app-name.firebaseapp.com",
  databaseURL: "https://app-name.firebaseio.com",
  projectId: "app-name",
  storageBucket: "app-name.appspot.com",
  messagingSenderId: "xxxxxxxxxxxx"
};
firebase.initializeApp(config);
export const provider = new firebase.auth.GoogleAuthProvider();
export const auth = firebase.auth();
export default firebase;
Import Firebase from ‘firebase’ at the top of this file to ease-up our future process. Because we’re using authentication through firebase as well, we’ll need a few more stuff. Add the firebase Provider and the firebase Auth into the file as well, just as in the example I posted before. At the end of our firebase.js file we need to export our firebase file so we can import it in all the files that will need to link with firebase.
That’s actually all we need to link our React App with React-router to Firebase! Woohoow, I hope you could still follow along so far?
Register new users in firebase
First things first, we can’t send messages without a user account. Because we need to know who send the message, so we know with who we’re chatting. Best to do authentication at the start, so we don’t need to manually edit all previous messages with a ‘sender_id’ or something like that. Here’s the setup for our Register.js component:
// /components/Auth/Register.js
import React from 'react';
import firebase from '../../firebase.js'
import { Link } from 'react-router-dom';
import './Auth.css';
import Login from './Login';
class Register extends React.Component{
	constructor(props){
		super(props);
		this.state = {
			username: '',
			email: '',
			password: '',
			error: null
		}
	}
	handleChange = e => {
		this.setState({[e.target.name]: e.target.value});
	}
	handleSubmit = e => {
		e.preventDefault();
		console.log('Submitting form...');
	}
	render(){
		const {email, username, password, error} = this.state;
		return(
			<div className="auth--container">
				<h1>Register your account</h1>
				{error && <p className="error-message">{error.message}</p>}
				<form onSubmit={this.handleSubmit}>
					<label htmlFor="username">Username</label>
					<input type="text" name="username" id="username" value={username} onChange={this.handleChange} />
					<label htmlFor="email">Email address</label>
					<input type="text" name="email" id="email" value={email} onChange={this.handleChange} />
					<label htmlFor="password">Choose a password</label>
					<input
						type="password"
						name="password"
						id="password"
						value={password}
						onChange={this.handleChange}
					/>
					<button className="general-submit" children="Get Started" />
					<p>Already have an account? <Link className="login-btn" to="/login">Login here</Link></p>
				</form>
			</div>
		);
	}
}
export default Register;
I’ll go over the file top to bottom. At the top, we import everything we need from React, firebase, and react-router. I am importing our Login component to easily switch to Login if our user already has an account. After that, we’ll create a constructor to set up our default state. We add an onChange handler for our inputfields (otherwise React doesn’t let us edit those fields) and an OnSubmit handler when our form will be submitted. For now, we only log ‘Submitting…’ to make sure this is working. We’ll add our firebase code in a minute!
After our functions we’ll add our jsx code inside the render() method. Our input fields need a name-attribute. Because this is what we target in our onChange function with [e.target.name] to change the current state. The value of the input-fields will be equal to their {state} value and we also add an onChange attribute that is equal to our handleChange() function.
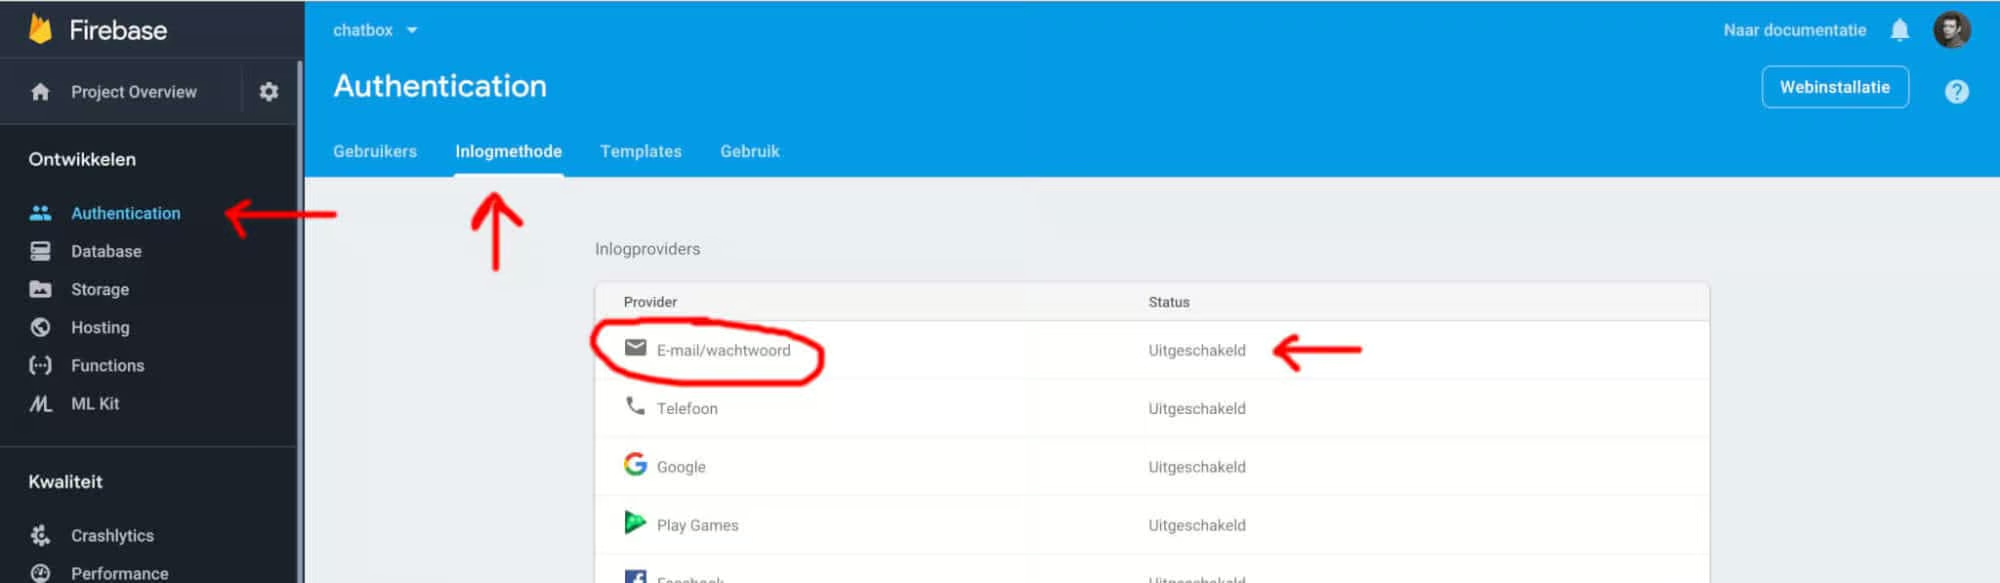
Update Firebase Authentication settings
Before we can start building user registration and login, we need to activate authentication in our firebase project. Head over to firebase and select the ‘Authentication’ tab from the left sidebar menu. In there, head over to the ‘inlog-method’ tab and enable email/password authentication.
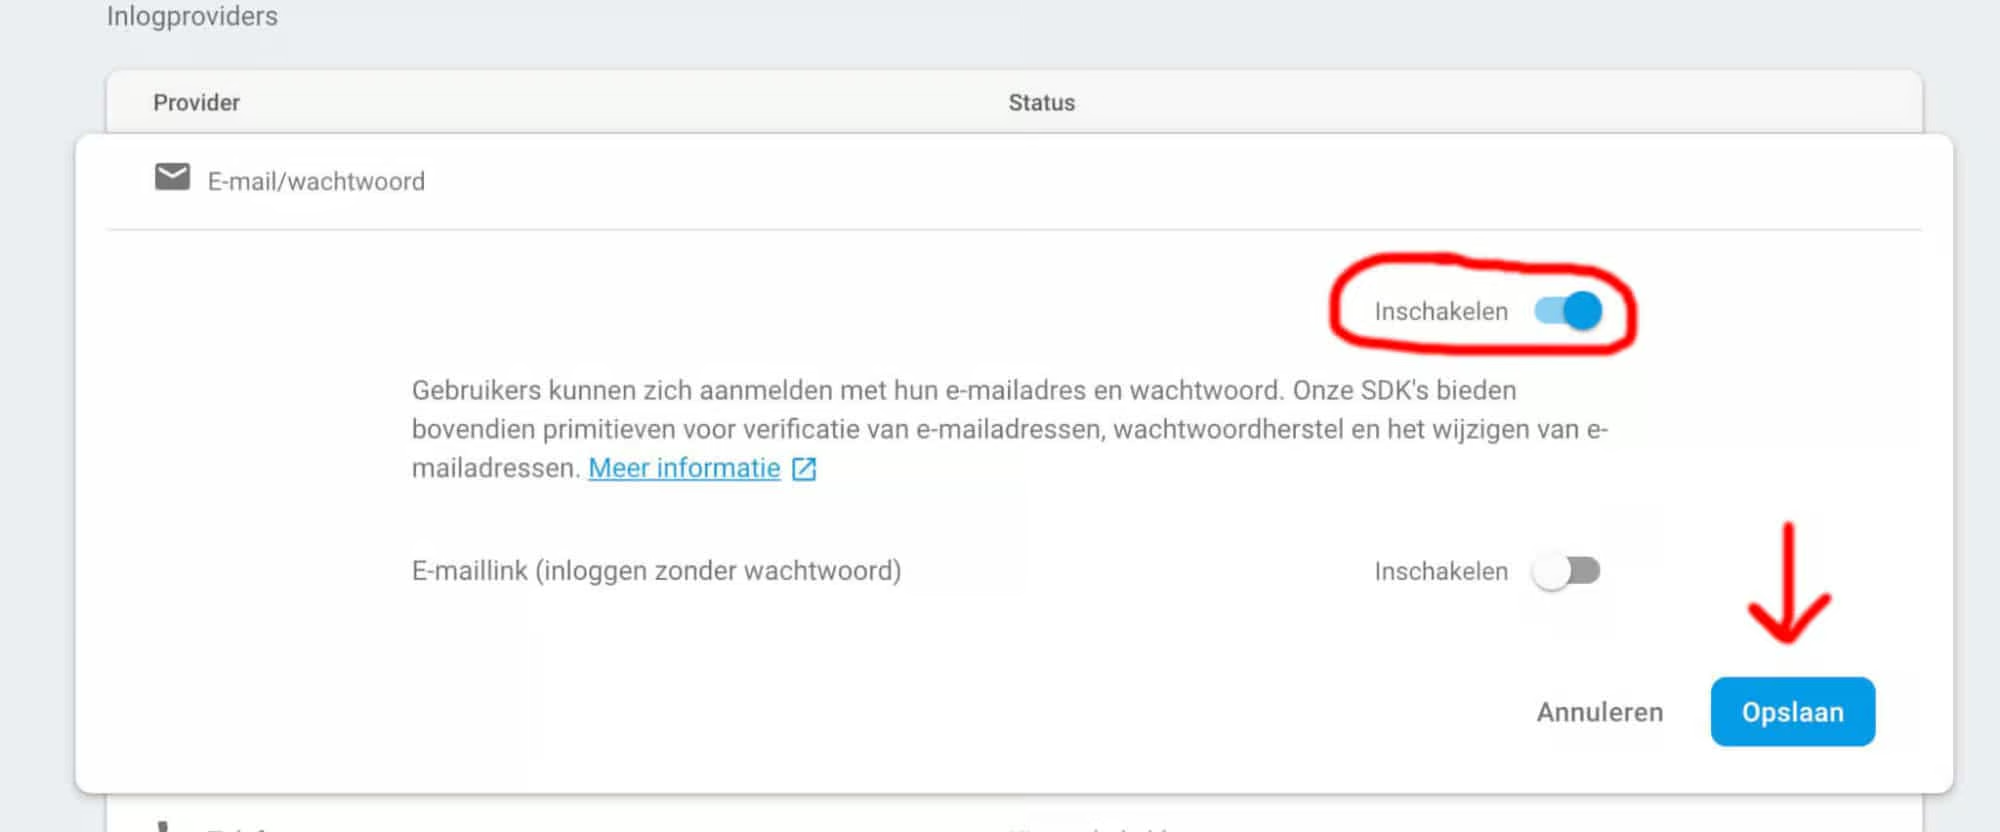
Once done, and our /register page is rendering correctly on the page, we can add our firebase code to register our users. Please change our onSubmit function to the following:
handleSubmit = e => {
    e.preventDefault();
    const {email, username, password} = this.state;
    firebase
        .auth()
	.createUserWithEmailAndPassword(email, password)
	.then(() => {
	    const user = firebase.auth().currentUser;
	    user
	        .updateProfile({displayName: username})
		.then(() => {
		    this.props.history.push('/');
		})
		.catch(error => {
		    this.setState({error});
		});
        })
    .catch(error => {
        this.setState({error});
    });
}
First, we’ll declare all the variables from our state with ES6 destructuring like this: const { email, username, and password }. After that, we can do our Firebase call. This one access a lot of functions at once. firebase.auth() gives us access to the firebase authentication methods. Next we call ‘createUserWithEmailAndPassword(). I mean… ever seen an easier way to register users to your database? I don’t think so! The user’s password will be automatically hashed and we automatically get a user UID. I’m in love!
The createUserWithEmailAndPassword() doesn’t allow to set a username all at once. So we’ll access the auth().currentUser directly after our registration and set the username ourselves. All Firebase calls are Promises, so we can hook them up with .then(() => {...}) and .catch(error => {...}) to catch all errors. We have an error-field in our state, which will be displayed on the page when we have errors. So after each catch, we’ll set the state to error. As you start playing with this, you will see that firebase gives us perfect error messages for everything that can go wrong.
Login existing users
The firebase registration function automatically logs-in new users. That’s why we redirect back to the homepage after registration, because the user will be logged in automatically. You can turn this off in your firebase settings as well as adding extra’s like user email confirmations first. But I am not going to cover that in this post.
Let’s build something to login existing users, as for now, we lose our login-state when we navigate to different pages. We will add something to keep track of our state in this login function. The login code is actually exactly the same as our registration code. Except the handleSubmit function, this will look like this:
handleSubmit = e => {
    e.preventDefault();
    const {email, password} = this.state;
    firebase
        .auth()
        .signInWithEmailAndPassword(email, password)
        .then(user => {
            this.props.history.push('/');
        })
        .catch(error => {
            this.setState({error});
        });
}
This is the handleSubmit event in our Login.js file. All the rest is the same as our registration file. Except of course for login, we’ll only use email and password, no username. But even the handleSubmit code looks the same. We just switchour the createUserWithEmailAndPassword() function with the signInWithEmailAndPassword() function.
Now… How do we remain logged in while switching views? We’ll be updating our index.js file for this:
// index.js
//Import firebase package
import firebase, {auth, provider} from './firebase.js'
//Add Contstructor to AppRouter component
constructor(props){
    super(props);
    this.state = {user: null}
}
//Add componentDidMount lifecycle
componentDidMount(){
    auth.onAuthStateChanged(user => {
    if(user){
        this.setState({user});
    }
});
We need to include firebase at the top of our indexfile to be able to use Firebase functions. We also add a constructor to initialize our starting state. If our component mounts, we’ll check with firebase if our ‘userstate’ (authstate in firebase) changed. If so, we check if we had a user, and we put the user in our React state again. So we’re actually pulling our Firebase state into our React state. (If you don’t logout in firebase, you will automatically be logged in when you visit the webpage again later on)
Logout the current user
Let’s build a function to log our current users out of the application. We’ll just run a logout function when clicking on a link, so we don’t need navigation or create a new component for this. Add a log out link to the navigation:
// element in index.js
I just use a regular <a> element, with on onClick handler that will run our logout function. here is the Logout function:
logOutUser = () => {
    firebase.auth().signOut()
        .then(window.location = "/");
}
This will log out our user on firebase and afterwards hard-redirect to the homepage again. If you don’t want the hard-redirect, you can just change the React-state user to null again. But with the hard-redirect, our componentDidMount will check our actual firebase state and will see that no-one is logged in anymore. If the logout function throws an error, make sure to bind this new logOutUser function in our AppRouter constructor.
What’s next?
Phew… This already feels like a lot actually… I am going to split this post up into two parts. This part, that does the firebase hookup with authentication. And a second part, where we will be building the chatbox.
Let me know if my examples and code are not clear! I am both learning how to do React & Firebase AND how to write decent blog posts at the same time. But hopefully, all works fine for you as well, and we can head over to PART 2: Building the chatbox!
You can see a live demo of this application here: https://chat.weichie.com. You need to register an account first before you can see the chat. I did not put any effort into styling.
The GIT Repo of this project can be found here: https://github.com/weichie/react-firebase-chat. Feel free to have a look around!