
Setting up a Vue Projects with Vue CLI, Vuex, Vue router and Firebase
Geupdate op februari 5, 2024
Let’s get started with Vue Firebase! I recently started a new job as freelance developer in a digital company and got to know more about VueJS. I took a break from React for now and will experiment more cool things with Vue from now on! This post is written with Vue 2.6.6 (CLI 3.3)
Why Vue?
Why Vue and not keep on going in React? As I mentioned I started freelancing for a new company, and they are hands-on with Vue. And as long as I can do just javascript, I’ll love whatever framework you give me! I struggled a little bit with getting firebase to work on my own, so that’s why I’m writing this article for.
Our project will handle all basic Vue project setups:
– Kick-starting a project with VueCLI
– Installing vue-router
– Installing Vuex, for simpler Vue state management
– Linking up Vue FireBase
– Firebase Auth
– FireStore user documents
I am new to the Firebase firestore myself as well, so I don’t know if my store-structure is any good, but at least it gets you linked up with firebase and you can continue the adventure on your own! As the firestore is out of beta from this week, maybe it has a promising future.. also: it’s free for small/personal use! What are we waiting for?
Kick starting with VueCLI
I’m assuming you’re pc is up-to-date for running Vue. With Node/npm/vue/… all installed. Head on over to cli.vuejs.org and install everything you need if not.
Once installed, launch your terminal and create our first project! I’ll be creating a client management tool for myself, but you can name it whatever you want. My project will simply be called ‘client’
vue create clientAfter this you’ll get some options. I’m just going for the default options here, and will install all the rest manually to explain.

Installing Vue Router + App cleanup
Once the project is created, navigate to your project and we’ll start off with installing the Vue Router first.
cd client
npm i vue-router --save
After this open up your lovely text-editor to start coding in the project. In App.vue remove the styles, the HelloWorld component and the default Vue Image. So our App.vue will look like this:
<template>
  <div id="app"></div>
</template>

<script>
  export default {
    name: 'app',
  }
</script>

<style>
</style>
You may remove the HelloWorld component completely from your project, as we’re not going to use it anyway obviously. You may create a new project called ‘Home.vue’ and put in these default values:
<template>
   <div class="wrapper">
      <h1>Home Component</h1>
   </div>
</template>

<script>
   export default {
      name: 'Home'
   }
</script>
We don’t need to style script in any of our components. We’ll add some css with sass/scss later on. Next, before we can test our router, add a Login.vue and a Register.vue component to our project as well. So we can start playing with the routes. Give them the same code as our Home component, but change the h1 tag and the ‘name’ in our scripts.
After you’ve created the 3 components (Home.vue, Login.vue, Register.vue) inside the components folder, create a new .js file outside the components folder, but still in our /src folder. Name this file routes.js. We’re creating this file to keep our routes in a seperate file, so we can easily manage it later.
// /src/routes.js
import Home from './components/Home'
import Login from './components/Login'
import Register from './components/Register'
export const routes = [
   {
      path: '/',
      name: 'Home',
      component: Home
   },{
      path: '/login',
      name: 'login',
      component: Login
   },{
      path: '/register',
      name: 'register',
      component: Register
   }
];
We need to include our Components at the top of the file first, so we can pass it as ‘component’ property in our routes. Further we’re defining what paths (url’s) will use what component. We will update and secure our routes later, but this is good enough for now. So let’s open our main.js file and add vue-router to our app!
import Vue from 'vue'
import App from './App.vue'
import VueRouter from 'vue-router'
import { routes } from './routes'
Vue.use(VueRouter);
Vue.config.productionTip = false
const router = new VueRouter({
  mode: 'history',
  routes
});
new Vue({
  router,
  render: h => h(App),
}).$mount('#app')
In main.js we import VueRouter from ‘vue-router’ and our routes from routes.js. After that we tell Vue to use vue-router with Vue.use(VueRouter) as a plugin. And of course our new router needs some options. I prefer mode: ‘history’ for clean URL’s. So my login page will look like <a href=”#!”>example.com/login</a> instead of <a href=”#”>example.com/#/login</a>.
Let’s go back to our terminal and run our project!
yarn serveWhat do we see? Completely nothing… what a bummer, we’re not there yet. Jeeez this setup… Ok, back in our App.vue we need to add a router-view component, so the router knows where to display our components of course.
// App.vue
<template>
<div id="app">
<router-view></router-view>
</div>
</template>
<script>
...
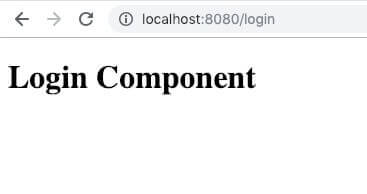
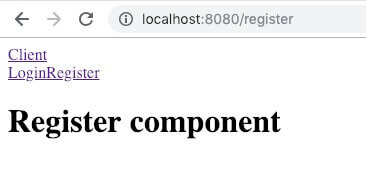
</script>And now we’ll see something! Jeeeej. If we now change our url to /login or /register, we’ll see our different components are displayed. I hope you’re getting the same results.
Adding navigation
It’s always fun to have some navigation in our app, so we can browse through our app with more ease. Next up: Create a Header.vue component in our /src folder, with links to the home, login and register component. The Header component will look like this:
<template>
   <header>
      <div class="logo">
         <router-link to="/" class="Logo">Client</router-link>
      </div>
      <div class="main-navigation">
         <router-link to="/login">Login</router-link>
         <router-link to="/register">Register</router-link>
      </div>
   </header>
</template>

<script>
   export default {
      name:" Header-component"
   }
</script>
Did I mention I really like the html and script part in Vue way over how React/jsx does it! No longer using className instead of just html-class.. But that aside, still loving react as well, you may have noticed I’m using <router-link> instead of just an a-tag. This is so our router knows it needs to take over the navigation, and not just let the server handle the request. Now we can add our Header into our app so we can use it:
// /src/app.vue
<template>
  <div id="app">
    <Header />
    <router-view></router-view>
  </div>
</template>

<script>
  import Header from './components/Header'
  export default {
    name: 'app',
    components: {
      Header
    }
  }
</script>
This is how we add components to other components. We Import the component in the top of our ‘script’ part, and tell this component we want to use this as a component inside our HTML part. After this we can simply use <Header /> as HTML-tag and poof, our header will show up.
Look how sexy it is! Styles I’ll leave completely up to you 🙂
State Management with Vuex
Nowadays you just can’t have a web-app without a state. If you’re new to State management in web-apps, all mayor js frameworks are using one. And from now on it will be your only source of truth in your app. This is very important to keep every component in your app up-to-date with each other. This will save you a lot of time in the future when you’re trying to let components communicate with each other.
Your app state will be managed with a Store. In my example I’m using Vuex as store management. The state will be accessible by every component in your app and your components will react to changes in the state, to keep it real-time. In our terminal, install Vuex:
npm i vuex --save(yes, I’m mixing npm install and yarn serve.. I just copy the npm i tags from npmjs.org when I’m adding new packages to my projects) But no worries, it all works 🙂 After installing Vuex, create a store folder in our /src folder. I love to keep my routes and my stores seperate from the rest of my application.
Inside /src, create a /store folder. Inside create a store.js file and a modules folder. Inside this module folder we’ll create an authStore.js file. This file will keep the authentication state from our users. Here is how it would look like:
/src
  /assets
  /components
  /store
    /modules
      authStore.js
    store.js
  App.vue
  ...
The Vuex store can work with different Modules, to keep all of your stores seperate. So now I’m creating an authStore, that will keep all my authentication data. Later on I can create a clientStore to keep all my client information, or a persisted store to keep a store of all the data I want to store in the users localStorage. You can create a new store for everything you want to keep seperate, so you can easely find and edit functionalities later on.
First, open authStore.js and we will write our first Module. A module can exist with following Objects: state, getters, actions and mutations:
// /src/store/modules/authStore.js
const state = {
   test: 'My first state!'
};
const getters = {
};
const actions = {
};
const mutations = {
};
export default {
   state,
   getters,
   actions,
   mutations
}
State: Will keep the state of our app. Every module will have their own state, getters, actions and mutations. But in this way, we can access our authState more specific, like this: this.$state.authState.name (to get logged in name) and this.$state.clientState.name (to get our clients name) for example.
Getters: Getters can be used to get data from our state, to our component. But as I wrote above in my State explanation, we can also access state data directly. But Getters can be used to create complex functionality across different states in your app! For example, I can access the authState from my clientState and visa versa!
Actions: Actions are actually kind-of the same as mutations, but it is best practice to use actions only to commit a mutation. Actions can also be used in asynchronous tasks, while Mutations can not. But it is best to dispatch an action from your components. And then commit an action to a mutation. With dispatch, all other components who are using that state will receive the new state value.
Mutations: Only used for updating the state of your application. A mutation can accept a payload to pass to your applications state.
And in the end, we’ll export those 4 objects, in 1 object. And now we’re ready to write our store.js file. Create one if you don’t have one already and add the following:
// src/store/store.js
import Vue from 'vue'
import Vuex from 'vuex'
Vue.use(Vuex);
import authStore from './modules/authStore'
export default new Vuex.Store({
   modules: {
      authStore
   }
});
This separate store.js file will import Vue and Vuex again. We’re adding Vuex as a Vue-plugin as well with Vue.use and then export our Vuex Store so we can import it in our main.js, so open main.js and add our brand new store!
// /src/main.js
import Vue from 'vue'
import App from './App.vue'
import VueRouter from 'vue-router'
import { routes } from './routes'
import store from './store/store'   // <-- add this line ---------
Vue.use(VueRouter);
Vue.config.productionTip = false
const router = new VueRouter({
  mode: 'history',
  routes
});
new Vue({
  router,
  store,  // <-- add this line ---------
  render: h => h(App),
}).$mount('#app')
This is how your main.js file should look like. Open up your app in the browser and check your vue dev tools to see if our state is present or not. If you see your state with our test value, you’re amazing! We have a working vue app with routing and a store to save our data!
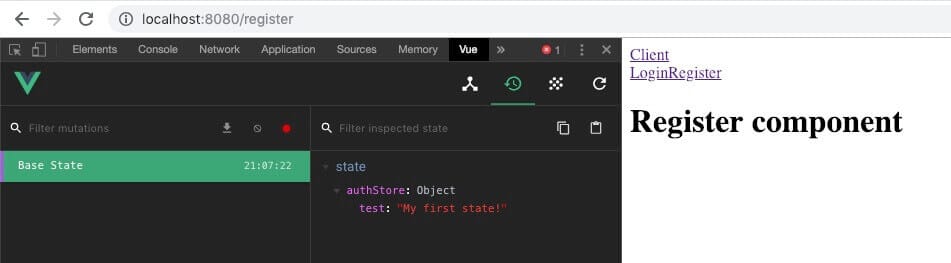
If you want to retrieve this item from the store to test if it is actually working, you can write this line in one of your view-components (home, login or register):
<h1>{{ this.$store.state.authStore.test }}</h1>Don’t forget to write {{ … }} in your html, to let Vue know you’re injecting javascript instead of plain html.
Time for Firebase!
I know the store is all fun and games, but it can’t actually save data. It saves data temporarely in the state, so your whole app can use it, but if you mutate something and refresh the page, the changes will be gone. You can persist your store locally to keep changes even after refresh, but let’s go even further and store our data online. So you can access the data from somewhere else than your own machine. (or that other users can access it)
Create a Firebase account
Before we can use Vue Firebase, we need an account obviously. If you don’t have one already, create one and start your first project! Firebase is completely free to use from small projects like personal ones like this. After creating your project, copy your web-credentials to make the connection from our app to our database.
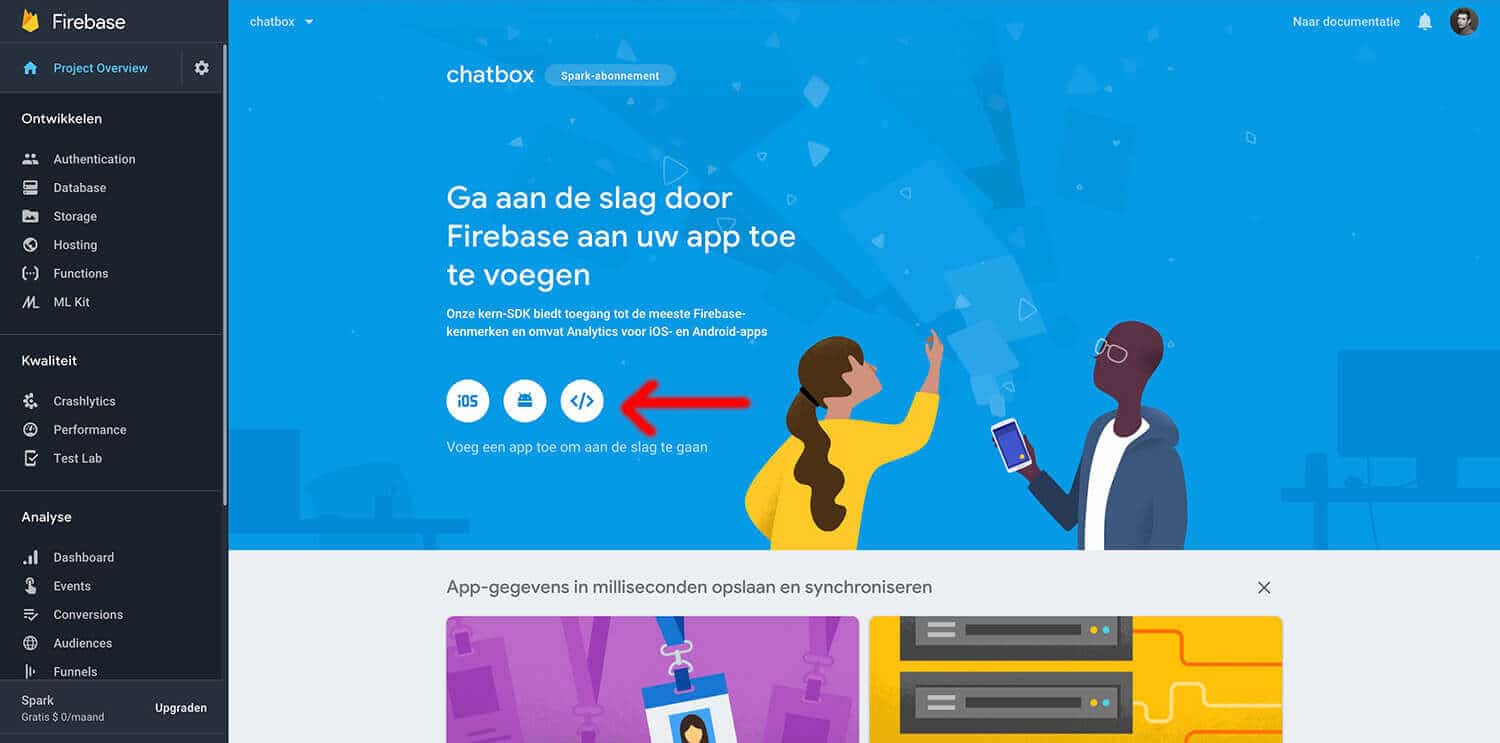
Now we need to install the firebase package in our app. You can use all sorts of firebase packages, but I prefer the official, basic one. (no vue-firebase, firestore, …) just simple firebase:
npm i firebase --saveThen head over to our app folder and create a new firestore.js file inside our /src folder. We include firebase at the top and past our credentials in this file, like this:
// /src/firestore.js
import firebase from 'firebase'
import 'firebase/firestore'
const config = {
   apiKey: "xxxxxxxxxxxxxx",
   authDomain: "xxxxxxxxxxxxxx",
   databaseURL: "xxxxxxxxxxxxxx",
   projectId: "xxxxxxxxxxxxxxt",
   storageBucket: "xxxxxxxxxxxxxx",
   messagingSenderId: "xxxxxxxxxxxxxx"
};
const firestore = firebase.initializeApp(config);
const db = firebase.firestore();
export default db;
And to finish off our setup, we’ll include this in our main.js file as well:
// /src/main.js
...
import firebase from 'firebase'
...
We don’t need firebase in our main.js file yet, but I include it now before I forget, as we need it later when we’re authenticating our app through vue firebase.
Registrating users with Vue Firebase
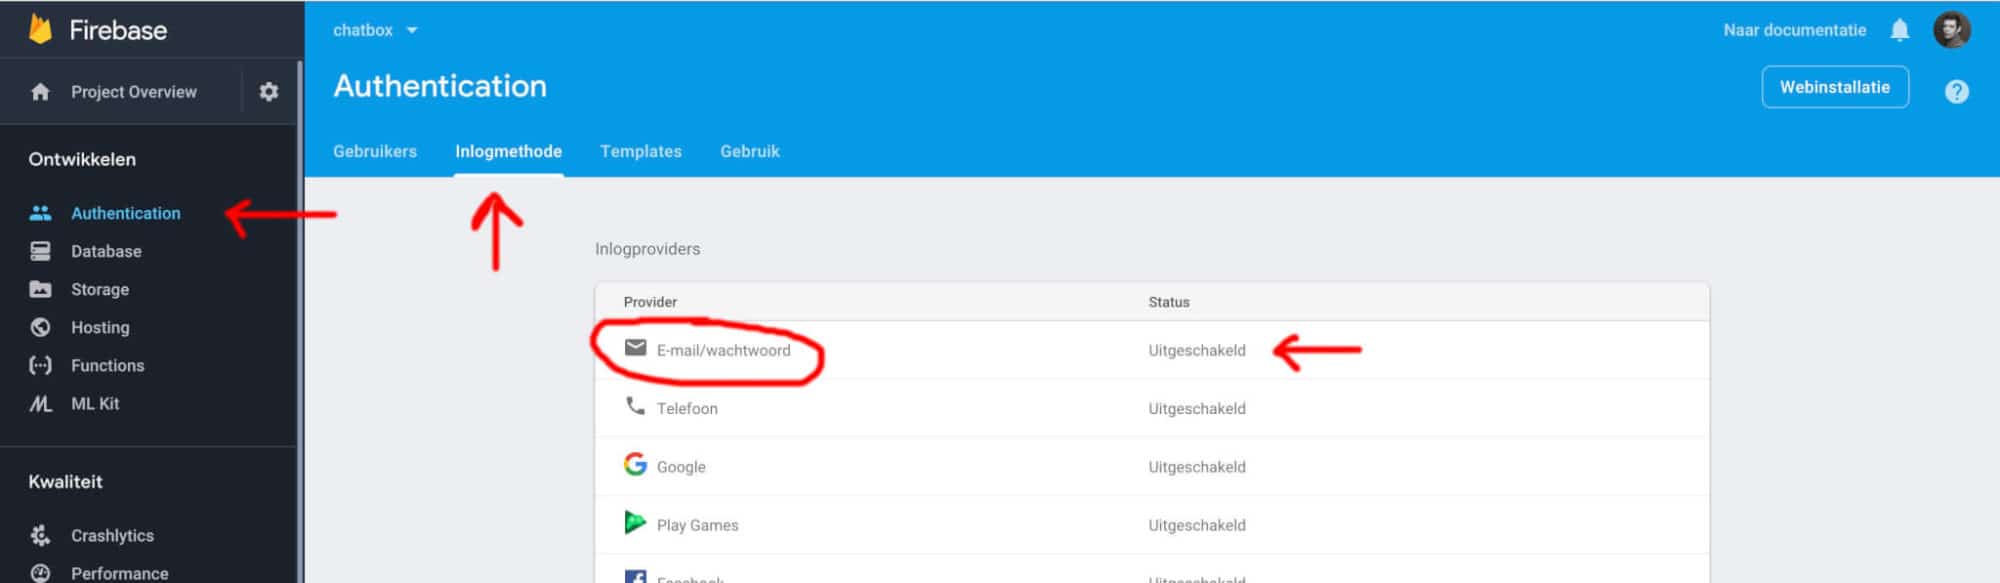
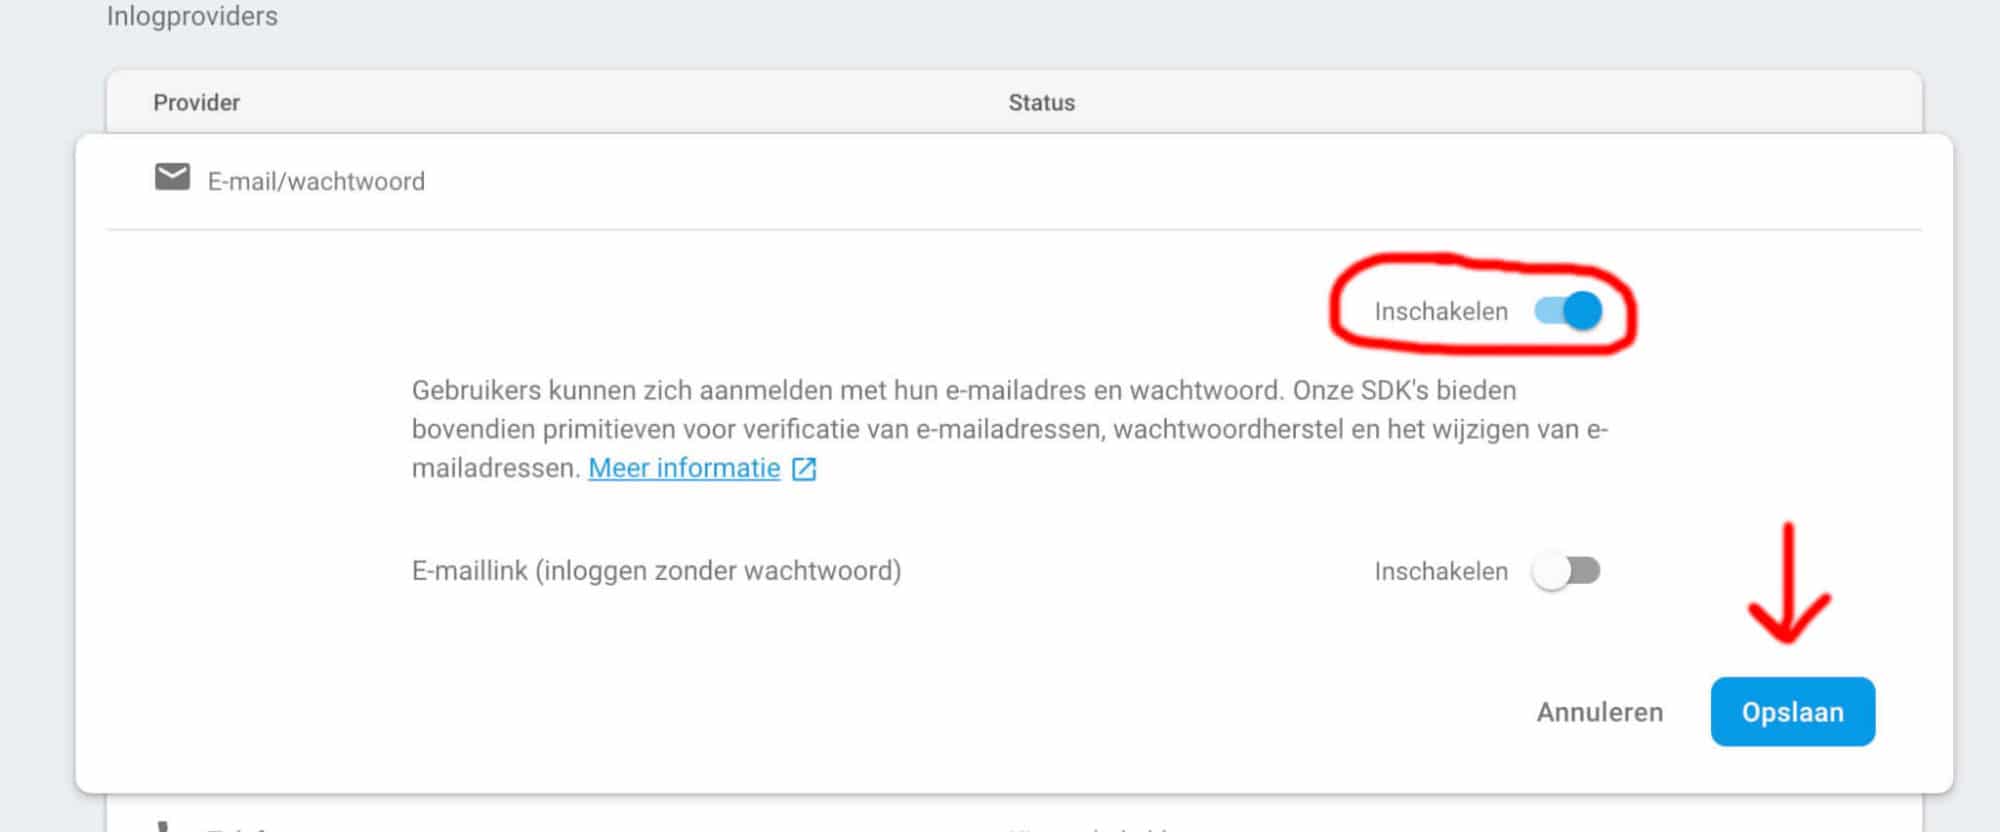
Time for the real work! I have the feeling that user creation through firebase, and an actual user-document in the firestore are seperate. So we need to create both a new user in the app auth AND in our firestore collection. First, enable email authentication in firebase:
So we’re allowed to create users in firebase with email. In our Register.vue file, add following HTML to get started.
// /src/components/Register.vue
<template>
   <div class="wrapper">
      <h1>Register component</h1>
      <form>
         <input type="text" placeholder="Firstname" /><br>
         <input type="text" placeholder="Lastname" /><br>
         <input type="text" placeholder="Username" /><br>
         <input type="email" placeholder="Email" /><br>
         <input type="password" placeholder="Choose a password" /><br>
         <button>Create account</button>
      </form>
   </div>
</template>
After we got our basic template, we can start writing our javascript to bind our input fields, and a setup for our registration function:
// /src/components/Register.vue
<script>
   export default {
      name: 'Register',
      data(){
         return{
            userData: {
               firstname: '',
               lastname: '',
               username: '',
               email: '',
               password: ''
            },
            successMessage: '',
            errorMessage: ''
         }
      },
      methods:{
         registerUser(){
            console.log('Register code is ready to go...');
         }
      }
   }
</script>
Before we can test if our basic setup is working, we’ll need to bind our scripts with our html. Update our html-template like this:
// /src/components/Register.vue
<template>
<div class="wrapper">
<h1>Register component</h1>
<form @submit.prevent="registerUser">
<input type="text" placeholder="Firstname" v-model="userData.firstname" /><br>
<input type="text" placeholder="Lastname" v-model="userData.lastname" /><br>
<input type="text" placeholder="Username" v-model="userData.username" /><br>
<input type="email" placeholder="Email" v-model="userData.email" /><br>
<input type="password" placeholder="Choose a password" v-model="userData.password" /><br>
<button>Create account</button>
</form>
</div>
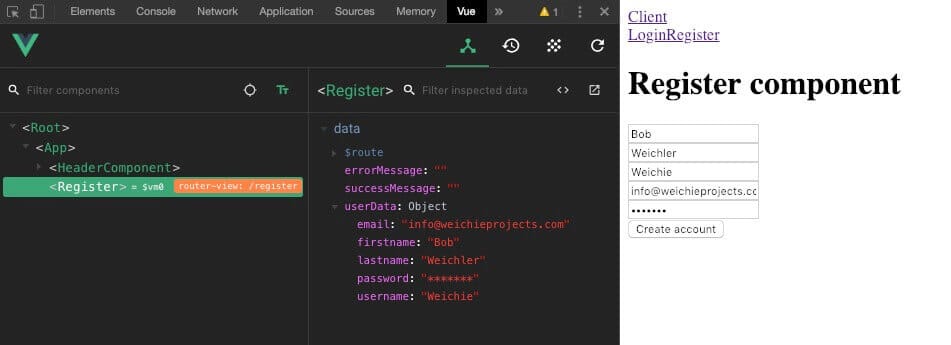
</template>If all goes well, we can see in our vue devtools that our input fields are bound to our components state. (heads up: this is NOT our app state, just the local Register.vue component state).
Again… I’ll leave the stylings up to you 😉 Ok if all of this works fine, we’re ready to write our Registration function! Back between our script tags, update the registerUser function:
// /src/components/Register.vue
import firebase from 'firebase'
import db from '../firestore'
...
registerUser(){
firebase.auth().createUserWithEmailAndPassword(this.userData.email, this.userData.password)
.then(user => {
console.log(user);
})
.catch(err => {
this.errorMessage = err.message
});
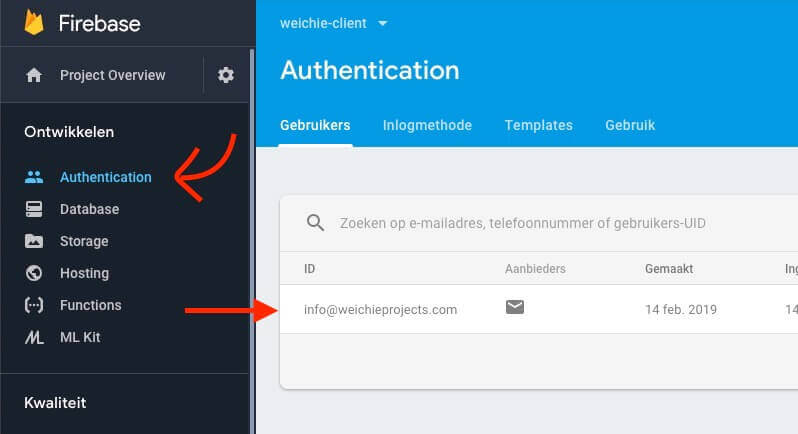
}FOR REAL… NO JOKE!!! This is all that’s needed to make this work. createUserWithEmailAndPassword(email, password) is all. it. takes. Unbelievable! Head over to your firebase users and check it out.
This is awesome.. but also not really. We now have a user in our authentication, so this user can login. But we don’t store any of the other information we asked at registration… The createUserWithEmailAndPassword function will only store email and password. The firebase User object can only store email, password, username, phone and avatar. For firstname, lastname, … we need our own User collection in our firestore, to be able to link users with their own profile and to use them later to link to friends, comments or likes for example. So after our createUser function, we’ll add a username to our official firebase user object, and create a new user in our userCollection to store all the other information. Go go go:
registerUser(){
            firebase.auth().createUserWithEmailAndPassword(this.userData.email, this.userData.password)
               .then(() => {
                  firebase.auth().currentUser.updateProfile({
                     displayName: this.userData.username
                  }).then(() => {
                     db.collection('users').add({
                        firstname: this.userData.firstname,
                        lastname: this.userData.lastname,
                        username: this.userData.username,
                        email: this.userData.email,
                     }).then(() => {
                        this.$router.replace('home');
                     }).catch(err => {
                        this.errorMessage = err.message;
                     });
                  }).catch(err => {
                     this.errorMessage = err.message;
                  });
               }).catch(err => {
                  this.errorMessage = err.message
               });
It’s a lot of chaining, as we first need to create the user, then get the current logged in user and update the profile with the username (displayname). After that, we can create our usercollection and add the new user. I hope you get the same result as me when you visit your firestore: (make sure it’s active AND in test-mode)
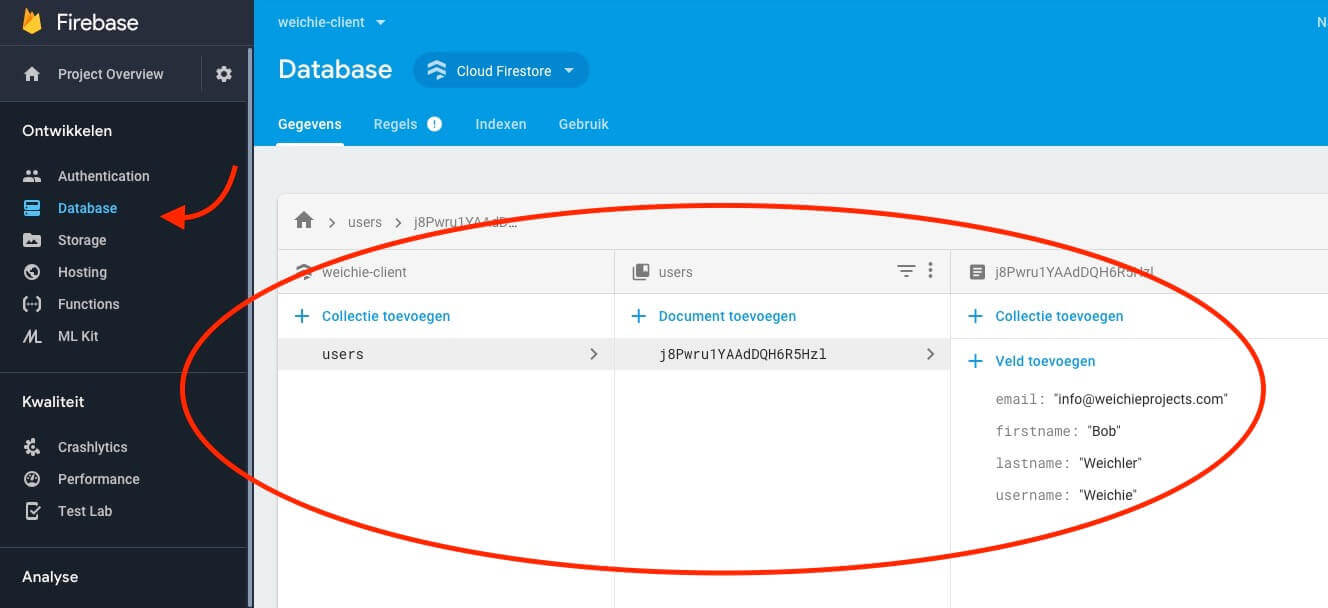
Try to add a few more users, to make sure all is working great. Next up: logging in!
Authenticating users with Vue and Firebase
Same as for our registration, we’ll start with a basic login template:
// /src/components/Login.vue
<template>
<div class="wrapper">
<h1>Login Component</h1>
<form>
<input type="email" placeholder="Email" /><br>
<input type="password" placeholder="Password" /><br>
<button>Login</button>
</form>
</div>
</template>And our script:
<script>
   export default {
      name: 'Login',
      data(){
         return{
            email: '',
            password: '',
            successMessage: '',
            errorMessage: ''
         }
      },
      methods: {
         login(){
            console.log('Logging in...');
         }
      }
   }
</script>
And before we write our Login logic, do some bindings in our template again:
<template>
   <div class="wrapper">
         <h1>Login Component</h1>
         <form @submit.prevent="login">
            <input type="email" placeholder="Email" v-model="email" /><br>
            <input type="password" placeholder="Password" v-model="password" /><br>
            <button>Login</button>
         </form>
   </div>
</template>
This is something I learned from React: NEVER have input fields in your app, that are not bound to a state! (uncontrolled input) Ok after the bindings, add our login script:
import firebase from 'firebase';
import db from "../firestore";
...
login(){
            firebase.auth().signInWithEmailAndPassword(this.email, this.password)
               .then(user => {
                  console.log(user);
               })
               .catch(err => {
                  this.errorMessage = err.message
               });
         }
If you login and get a userObject in your console, you know you’re good!

Jeeej! Big Congratzzzz to you! 🙂
Now you have your user state stored in your firebase ‘state’ (you can’t see with the vue devtools) but I advice you store your userState in your own Vuestore as well. In our case, our authStore.js. But this is up to you. I’ll continue with showing you how to add a route-guard so our dashboard is only accessible when we’re logged in and to make sure our login state is saved even after we refresh the page. Because this is not the case right now.
Good job for making it this far in my tutorial! Let me know if I went over some parts too fast or if all worked out very well for you! I was struggling with Vue Firebase tutorials in the beginning as well, so I hope I explained it much better!
Navigation Guard
Now, let’s add a route guard in our app, so that some pages can only be accessed when a user is logged in. Like a dashboard for example. If a user navigates to the dashboard, we will redirect them back to the login page if they’re not logged in already. First, create a new dashboard component in your components folder. This will just have the basic template stucture. After you’ve created the dashboard component, open up your routes.js file and add a catch-all route that will redirect to the login page. Then add a route to the /dashboard and add a meta key object inside, that says ‘requiresAuth: true’:
// /src/routes.js
...
import Dashboard from './components/Dashboard'
export const routes = [
   {
      path: '*',
      redirect: '/login'
   },{
      path: '/',
      name: 'Home',
      component: Home
   },{
      path: '/dashboard',
      name: 'Dashboard',
      component: Dashboard,
      meta: {
         requiresAuth: true
      }
   },{
      ...
   },{
      ...
   }
];
Now that some of our routes have the meta tag requiresAuth, we need to loop over all our routes in main.js to check if we need to be logged in to access the page or not. Add this in our main.js file:
const router = new VueRouter({
  ...
});
router.beforeEach((to, from, next) => {
  const currentUser = firebase.auth().currentUser;
  const requiresAuth = to.matched.some(record => record.meta.requiresAuth);
  if (requiresAuth && !currentUser) next('login');
  else if (!requiresAuth && currentUser) next('dashboard');
  else next();
});
new Vue({
  ...
Now you see we can’t access to /dashboard page without logging in first.
Keeping the Auth State alive
What is the point of logging in, when the app forgets we’re logged in after we refresh the page? For our firebase authentication to stay alive, we can use the build-in firebase function ‘onAuthStateChanged’. Add following code around our app = new Vue({…}) code, like this:
// /src/main.js
...
let app = '';
firebase.auth().onAuthStateChanged(user => {
  if(!app){
    app = new Vue({
      router,
      store,
      render: h => h(App),
    }).$mount('#app')
  }
});
Now you can see that after logging in, we can access the /dashboard page! woohoow.
Logging out of our application with Vue Firebase
One small thing I forgot to add, is the ability to logout of our application… Add a logout link to your header with an @click function to a logout method:
<a @click.prevent.stop="logout">Logout</a>And in the script-tag of our header component:
<script>
   import firebase from 'firebase'
   export default {
      name: "Header-component",
      methods: {
         logout(){
            firebase.auth().signOut().then(() => {
               this.$router.replace('login');
            });
         }
      }
   }
</script>
That’s it! A complete Vue project setup with the VueCLI, routing, store management and a firebase firestore! Congratzzz
Nieuwsbrief
Schrijf je in voor onze laatste updates, 1x per kwartaal!