Using Yoast SEO in Headless WordPress with Nuxtjs
Updated on November 9, 2023
I recently started getting into building PWA’s with Nuxtjs and before getting into building whole e-commerce platforms for production… I thought it was a good idea to test with smaller headless WordPress websites first.
This article is for people who’re already using a headless WordPress setup and want to use the Yoast SEO fields also in their web-app. In my case I’m using Nuxtjs, as they have a built-in head( ) function that will manage the head-tags of the page.
The basics for Nuxt Head
Nuxt.js uses vue-meta to update the document head and meta attributes of your application. It is a handy npm library inspired by react-helmet for React. It allows you to manage your app’s metadata.
To show a small example, the title of my page without header looks like this:

It’s the default name of my app. While using the following small head() snippet in the script tag of our page, we can change it to whatever we want. It will look like this:
<template>
  ...
</template>

<script>
export default {
  data() {
    return {
      pageTitle: 'Test title',
    }
  },
  methods: {
    ...
  },
  head() {
    return {
      title: this.pageTitle,
    }
  },
</script>
Notice that the head() tag looks like our data() tag. It’s a function that returns an object. If we check our page component with the Vue developer tools, we can see that the head() tag is listed under our computed data.

Adding Yoast to the party
A popular, if not the most popular, SEO tool in WordPress is Yoast SEO. It provides a handy interface to edit your meta tags and the content that will show up in Google or social media. The tool also displays tips on how you can write better articles around your keywords and stuff.
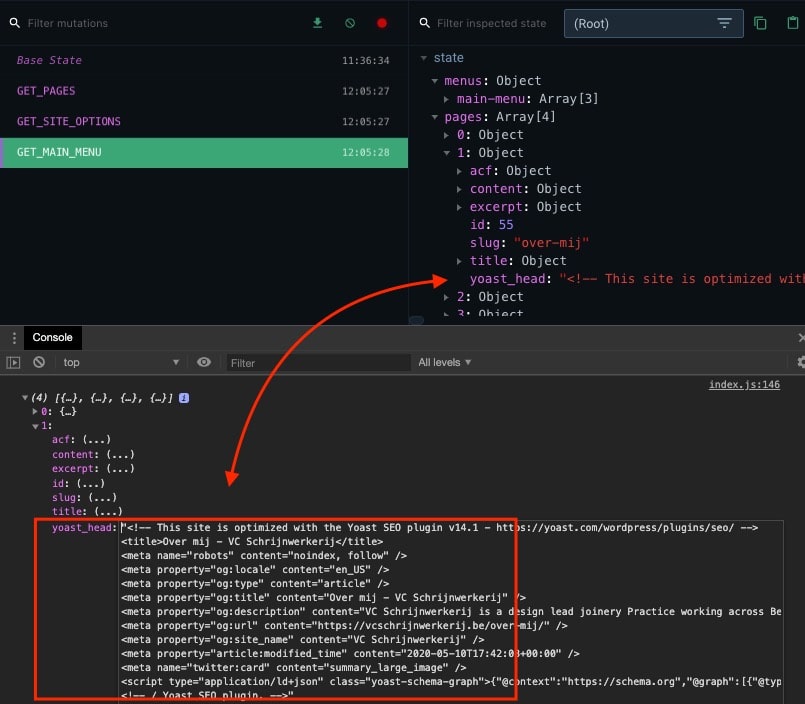
When you are building a WordPress website, Yoast kinda is a must-have tool. While going headless, I don’t want to let me clients know they can’t use Yoast anymore to improve their articles. So luckily… Yoast is included in the WordPress REST by default. Look at that! When we pull our pages, the yoast data in our object comes like this:

Doesn’t anybody want to have their data displayed in a massive string of html-tags? I can’t believe Yoast is soo lazy to just push their data like this. EVENT THE YOAST COMMENT LINE IS PUSHED THROUGH!!
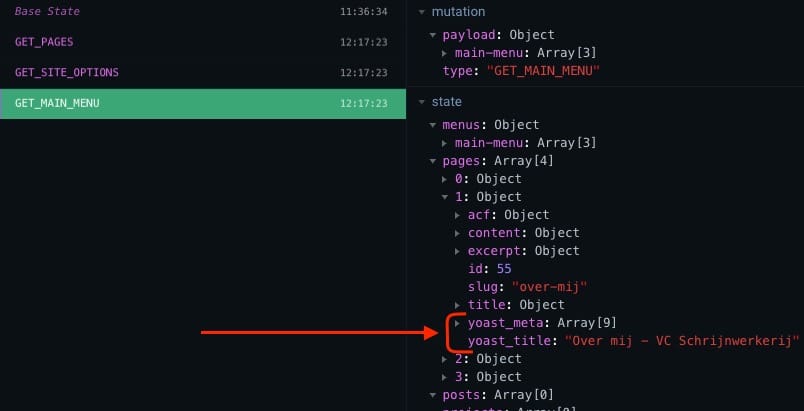
Luckily there is a plugin that adds our Yoast fields to our REST data in a decent matter. A big thanks to our buddies from Acato for building this! After installing this plugin, you can add yoast_title and yoast_meta to your axios response when pulling our pages. After doing that, our REST data will look like this:

Now we can simply pull the specific title we entered as page-title and all the extra Yoast fields that were created on that page. Because our meta tags come in as an array, we can easily loop through every available field and automatically add them to our head() script:
<script>
export default {
  ...
  head() {
    if(this.page) {
      const metaArray = [];
      this.page.yoast_meta.map(ele => {
        metaArray.push({
          hid: ele.name ? ele.name : ele.property,
          name: ele.name ? ele.name : ele.property,
          content: ele.content,
        });
      });

      return {
        title: this.page.yoast_title,
        meta: metaArray,
      }
    }
  }
}
</script>
When building our metaArray, I’ve inserted a small check to see if we have an element name or not. The toast-to-rest plugin sometimes works with name and sometimes with properties. So if we have n element name, we use the name, otherwise we’ll use the property.
Notice also the if statement at the start of our head() tag. This is because I need to wait on axios to actually return our page data. As I told before, the head() element is listed as a computed property in our vue devtools, so they will automatically update when data comes in or changes on the go.
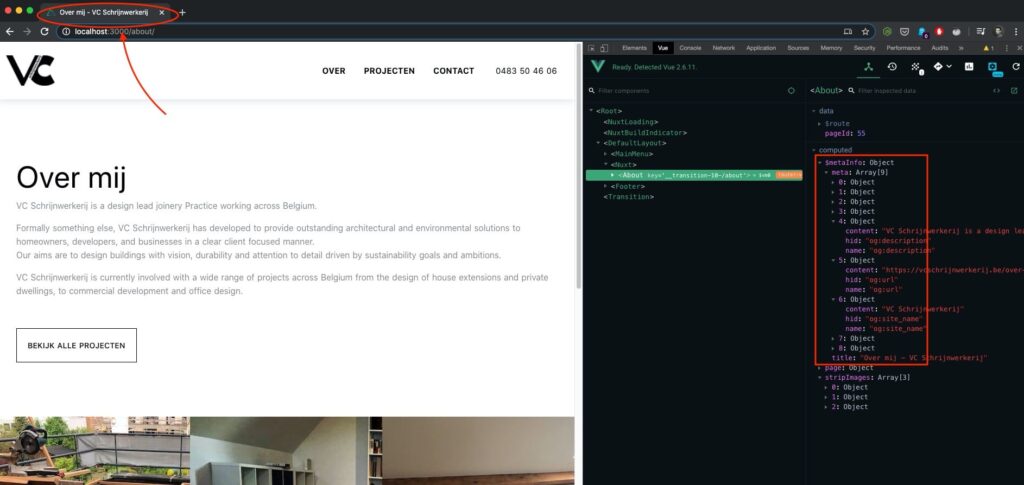
This brings our final result to this:

For me, this is all I need to insert Yoast in my headless WordPress PWA’s!
I will be writing a more detailed post about how to setup a headless WordPress – Nuxt app yourself as well. But for now I just wanted to post how to use the Yoast plugin in your headless wordpress apps. Hope it helps 🙂


Newsletter
Signup for news and updates, once each quarter!
4 Comments
Thanks for sharing,
It’s a very informative and interesting article.
I really enjoy your content.
Hey hey, saw your comment about us being lazy 🙂 Honestly we thought about this and decided that that was the better approach, but since more people wanted the separate fields, as of 16.7 you won’t need that extra plugin anymore as the separate fields are now added to the REST API as well.
Hi Joost, Thank you for leaving your comment! Looks like I need to play around with the latest Yoast version in the REST API and update my article 😉
Hello thank you for this article !
there is a little problem using array for render the yoast meta with the og:url,
it return the “backend wordpress url” instead of the frontend “nuxt app url”
is it possible to change it easily keeping the array ?