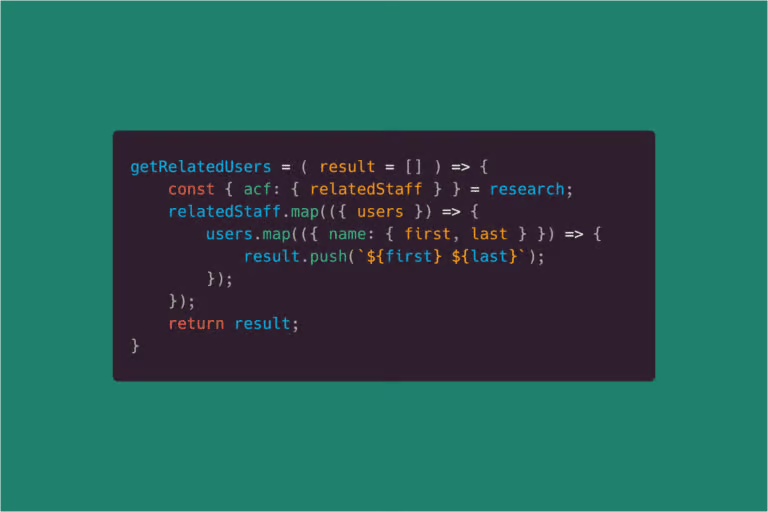
Yet another destructuring post.. It’s a function I always forget that exists in javascript, so I hope this post can show you it’s power and beauty, so you’ll remember! The javascript destructuring assignment makes it possible to extract data from arrays and objects into distinct variables. Without declaring them first! A ma zing!!
(more…)Let’s get started with Vue Firebase! I recently started a new job as freelance developer in a digital company and got to know more about VueJS. I took a break from React for now and will experiment more cool things with Vue from now on! This post is written with Vue 2.6.6 (CLI 3.3)
(more…)I want to start creating apps with React, and what better way to do this than with a real-time application that other people can use? Making ‘real’ stuff, gives me more motivation to start learning new things. I’ll be building a React Chat application with firebase and will blog along the way, to let you know how I did it and where I struggled. Hopefully it can help you getting started with React or Firebase as well!
(more…)During the Christmas holidays I had a few days off at work so I thought… This is the perfect moment to redo my personal website! With all the new things I’ve learned during my internship last year, I was pretty excited to challenge myself. I’m pretty happy with my results and I hope I could impress you as well! (more…)
I recently started getting into building PWA’s with Nuxtjs and before getting into building whole e-commerce platforms for production… I thought it was a good idea to test with smaller headless WordPress websites first.
This article is for people who’re already using a headless WordPress setup and want to use the Yoast SEO fields also in their web-app. In my case I’m using Nuxtjs, as they have a built-in head( ) function that will manage the head-tags of the page.
Nuxt.js uses vue-meta to update the document head and meta attributes of your application. It is a handy npm library inspired by react-helmet for React. It allows you to manage your app’s metadata.
To show a small example, the title of my page without header looks like this:

It’s the default name of my app. While using the following small head() snippet in the script tag of our page, we can change it to whatever we want. It will look like this:
<template>
...
</template>
<script>
export default {
data() {
return {
pageTitle: 'Test title',
}
},
methods: {
...
},
head() {
return {
title: this.pageTitle,
}
},
</script>

Notice that the head() tag looks like our data() tag. It’s a function that returns an object. If we check our page component with the Vue developer tools, we can see that the head() tag is listed under our computed data.

A popular, if not the most popular, SEO tool in WordPress is Yoast SEO. It provides a handy interface to edit your meta tags and the content that will show up in Google or social media. The tool also displays tips on how you can write better articles around your keywords and stuff.
When you are building a WordPress website, Yoast kinda is a must-have tool. While going headless, I don’t want to let me clients know they can’t use Yoast anymore to improve their articles. So luckily… Yoast is included in the WordPress REST by default. Look at that! When we pull our pages, the yoast data in our object comes like this:

Doesn’t anybody want to have their data displayed in a massive string of html-tags? I can’t believe Yoast is soo lazy to just push their data like this. EVENT THE YOAST COMMENT LINE IS PUSHED THROUGH!!
Luckily there is a plugin that adds our Yoast fields to our REST data in a decent matter. A big thanks to our buddies from Acato for building this! After installing this plugin, you can add yoast_title and yoast_meta to your axios response when pulling our pages. After doing that, our REST data will look like this:

Now we can simply pull the specific title we entered as page-title and all the extra Yoast fields that were created on that page. Because our meta tags come in as an array, we can easily loop through every available field and automatically add them to our head() script:
<script>
export default {
...
head() {
if(this.page) {
const metaArray = [];
this.page.yoast_meta.map(ele => {
metaArray.push({
hid: ele.name ? ele.name : ele.property,
name: ele.name ? ele.name : ele.property,
content: ele.content,
});
});
return {
title: this.page.yoast_title,
meta: metaArray,
}
}
}
}
</script>
When building our metaArray, I’ve inserted a small check to see if we have an element name or not. The toast-to-rest plugin sometimes works with name and sometimes with properties. So if we have n element name, we use the name, otherwise we’ll use the property.
Notice also the if statement at the start of our head() tag. This is because I need to wait on axios to actually return our page data. As I told before, the head() element is listed as a computed property in our vue devtools, so they will automatically update when data comes in or changes on the go.
This brings our final result to this:

For me, this is all I need to insert Yoast in my headless WordPress PWA’s!
I will be writing a more detailed post about how to setup a headless WordPress – Nuxt app yourself as well. But for now I just wanted to post how to use the Yoast plugin in your headless wordpress apps. Hope it helps 🙂
Loading more posts with ajax is a very popular UI button in today’s websites. On WordPress, a lot of people use plugins, page builders, or free/purchased themes that come shipped with this functionality. But writing it custom is not that hard either! So let’s try to create one today. As a bonus, we also cover load-more with pagination and the horror of the WordPress ‘offset’ function when trying to paginate.

I’ve covered this topic a few years ago when I was young and inexperienced. When I look back an the way I loaded more posts with ajax back then, I get the feeling every programmer has looking back at his/her code from a few years back. But… the post received a decent amount of traffic so I kept it online to help people create their own ajax load more function. But if you want a laugh, please visit my older way of loading more posts on WordPress with ajax 🙂
Now, a few years later, the time has passed and I use the admin-ajax function from WordPress way more instead of creating my own API calls to receive my posts. So this is what I’ll cover in this post:
Let’s start off with the basic query for our posts. The query will display the first 6 posts from our post-type ‘publications’. As you can see, I also added the ‘paged’ parameter but hardcoded it to 1. This is because we’ll be loading more posts using javascript and are not listening to a query parameter. Visiting website.com/page/2 will NOT display the second page in this example as we’re not listening to the query var.
The following code example should go in your template file where you want to display your post-list. I’m using get but you can hardcode your card template in this loop as well. Having them as a template part makes it clearer later when we’re also loading those cards using javascript.
<?php
$publications = new WP_Query([
'post_type' => 'publications',
'posts_per_page' => 6,
'orderby' => 'date',
'order' => 'DESC',
'paged' => 1,
]);
?>
<?php if($publications->have_posts()): ?>
<ul class="publication-list">
<?php
while ($publications->have_posts()): $publications->the_post();
get_template_part('parts/card', 'publication');
endwhile;
?>
</ul>
<?php endif; ?>
<?php wp_reset_postdata(); ?>
<div class="btn__wrapper">
<a href="#!" class="btn btn__primary" id="load-more">Load more</a>
</div>
The code above can be split into 3 main sections. The first one is the query to actually get the first 6 posts from ‘publications’. The second part is our loop over the results of the $publications query. Don’t forget to call the wp_reset_postdata() function, in the end, to make sure the rest of our page continues to work correctly. Finally, we also add the “load more” button under our list to be able to load more posts.
Now that we have our base setup ready, it’s time to link some javascript and Ajax to that load-more button!
Now it’s time to add a click event to our load more button. I will be using jQuery in this tutorial, as it comes shipped by default with WordPress. And because this post is specifically for loading more posts with Ajax in WordPress, I will be doing just that.
For the JS part, head over to your javascript folder and add a click event to the button. You can use arrow functions if you’re feeling fancy, but because I did not cover a babel-compiler setup I’m going for the more stable old-school way:
$('#load-more').on('click', function() {
// We will do our magic here soon!
}
Before we continue, there are a few things we need to keep in mind. We want to load ‘more posts’, not just any posts, but more specifically only the next page of posts. So we need to keep track of the current page we’re on, and the page we want to load next.
The benefit of using Ajax to load more posts is that our page will not refresh. This means that we can remember things in plain javascript, without the need of storing data in localStorage or using some sort of $store as we have in React or Vue. A simple variable in javascript will do just fine.
We will edit our javascript snippet with a variable to keep track of the current page, and we add the $ajax call to our ajax function that we will write in the next chapter.
let currentPage = 1;
$('#load-more').on('click', function() {
currentPage++; // Do currentPage + 1, because we want to load the next page
$.ajax({
type: 'POST',
url: '/wp-admin/admin-ajax.php',
dataType: 'html',
data: {
action: 'weichie_load_more',
paged: currentPage,
},
success: function (res) {
$('.publication-list').append(res);
}
});
});
If you want to test this snippet to make sure it’s working I need to disappoint you. This will not work just yet. We are now making a call to a WordPress function that we did not write yet! So let’s do that first before testing or complaining that it is not working.
But we can still test it to make sure we’re going in the right direction so far. When you click the load more button, nothing should happen visually on the page. But if you open your chrome dev tools and navigate to the Network tab, you should be able to see that we made an ajax request to admin-ajax.php.

This admin-ajax.php request will only become visible when you click our button. Clicking it again will make a second call (and then our payload should show ‘paged: 3’). We can see two things in our payload: The ‘action’ and ‘paged’. These are the two things we passed in our javascript $ajax call under data {}. It should return an error for you, as it cannot find our function ‘weichie_load_more’.
The payload is what we’re sending from our frontend to our backend. Because of this payload, we have access to the page we want to load in our PHP function where we will be doing the query. So next up: Creating our weichie_load_more function that will actually load more posts for us.
I don’t know how familiar you are with WordPress Queries and custom plugins? Some developers prefer creating plugins for their custom code, but I prefer to add our functionalities straight into the functions.php file in our WordPress root.
You may add the following snippet to your functions.php:
function weichie_load_more() {
$ajaxposts = new WP_Query([
'post_type' => 'publications',
'posts_per_page' => 6,
'orderby' => 'date',
'order' => 'DESC',
'paged' => $_POST['paged'],
]);
$response = '';
if($ajaxposts->have_posts()) {
while($ajaxposts->have_posts()) : $ajaxposts->the_post();
$response .= get_template_part('parts/card', 'publication');
endwhile;
} else {
$response = '';
}
echo $response;
exit;
}
add_action('wp_ajax_weichie_load_more', 'weichie_load_more');
add_action('wp_ajax_nopriv_weichie_load_more', 'weichie_load_more');
As you can see, our query part is actually the exact same thing as we have in our page template. We’re performing the exact same query, but the only difference here is that we’re pulling paged: 2 (or 3 or 4) instead of the first page.
We have our $ajaxposts which is our WordPress query we’ll be looping over (exactly like we do in our page template). We also declare a variable $response that will store our results. We then loop over our ajaxposts and in each iteration, we append our template_part to our response using the .= notation. And finally, we echo our $response and this is what we’ll be sending back to our javascript.
This is because of the pagination. We don’t want to pull the same posts when clicking on ‘load more’, but give us the same amount of posts, from the next page. Now that we have this, we can test if clicking on the button still returns an error or not. But normally, it should return us the HTML blocks of the 6 posts from page 2. You can check this out in our network tab again, but instead of going to Payload (what we’re sending to the backend) we can check under Response (what the backend is sending back to the frontend)

Cool, now that we have a response that is sending back our new list items for page 2, it’s time to make them appear on the website. The ‘Response’ we’re seeing in our network tab is automatically returned to our $ajax request.
If you’re lucky, our current code could be already working for you. When you take a look at our current JS part, we already have a success: function in our ajax call:
// Nothing changed in our JS. This is just to show which part I'm talking about.
$.ajax({
...
dataType: 'html',
...
success: function (res) {
$('.publication-list').append(res);
}
});
The success function takes a parameter ‘res’ that holds our ajax response. Because we passed a dataType in our call, it knows we’re expecting HTML for the response. We simply target our $(‘.publication-list’) and .append the result (which is HTML). The append function is default jQuery.
Debugging: If the code is not working for you, we need to debug a little more. Try to log your res to the console and check what type of data is returning for you. You can’t write any js inside our ajax object, but because the success: function() { ... } – obviously – is a function, we can write console.log(res)inside the success function for debugging.
Now that our code is working and actually loads more posts, you’ll probably discover another problem soon, if the programmer in you hasn’t already. What if there are no more posts? Example: We have 4 pages and we reached page 4, then clicking on our load more button will load page 5 -> which is empty. We need to hide our load more button when we reached the last page, or add an inactive class or whatever you would like to do at the end.
They also check if we’re on the last page, we will change our ajax call to not return plain HTML, but to actually receive a JSON response. In this response, we will both put our HTML response (as we already have it right now) and the max_pages. This is needed to check if our current page index is bigger or equal to the max_pages. If so, we can hide our button because we reached the max amount of pages.
First things first, update our ajax call to work with JSON instead of HTML. Please note that making this change will break our current functionality for now, but we will fix it shortly!
In your JS file, change the ajax call to the following:
$.ajax({
type: 'POST',
url: '/wp-admin/admin-ajax.php',
dataType: 'json', // <-- Change dataType from 'html' to 'json'
data: {
action: 'weichie_load_more',
paged,
},
success: function (res) {
$('.publication-list').append(res);
}
});
We only changed the dataType for now. We also need to change our response in a minute, but first, we’ll be updating our PHP Query in the functions.php file to the following:
function weichie_load_more() {
$ajaxposts = new WP_Query([
'post_type' => 'publications',
'posts_per_page' => 6,
'orderby' => 'date',
'order' => 'DESC',
'paged' => $_POST['paged'],
]);
$response = '';
$max_pages = $ajaxposts->max_num_pages;
if($ajaxposts->have_posts()) {
ob_start();
while($ajaxposts->have_posts()) : $ajaxposts->the_post();
$response .= get_template_part('parts/card', 'publication');
endwhile;
$output = ob_get_contents();
ob_end_clean();
} else {
$response = '';
}
$result = [
'max' => $max_pages,
'html' => $output,
];
echo json_encode($result);
exit;
}
add_action('wp_ajax_weichie_load_more', 'weichie_load_more');
add_action('wp_ajax_nopriv_weichie_load_more', 'weichie_load_more');
We changed a few more things in our PHP query than we had in our JS. But let’s go over them in more detail. The query itself remains untouched. We also still have our empty string $response = '';. We then use a default WordPress functionality to catch the max_num_pages from a query. This will return the maximum amount of pages we have for this query. So our load more button can max load “max_num_pages”-amount of pages.
Then while we’re looping over our query and appending each found post to our $results string, we actually wrap it this time inside a PHP buffer, called output buffer. While output buffering is active, no output is sent from the script and the output is stored in an internal buffer instead. before we end our output buffer, we store the result in another variable named $output.
In the end, right before we will return our results back to our javascript file, let’s create our return array:
// Nothing changed, just zooming in on our final result array
$result = [
'max' => $max_pages,
'html' => $output,
];
echo json_encode($result);
We create an array that takes the $max_pages, to return the max amount of pages for this query, and our HTML. The $output we’ve created from within our post-loop. To return an array back to our json file, we need to encode the array for JSON and return it like that.
Finally, to work with our new output, we also need to tweak our javascript. Because we’re not getting HTML as a response, but JSON, we need to go one level deeper when printing the response to the page. Change your javascript success function to the following:
$.ajax({
...
success: function (res) {
if(paged >= res.max) {
$('#load-more').hide();
}
$('.publication-list').append(res.html);
}
});
Our ‘res’ from our function(res) will now hold a json object with 2 key-value pairs. A key ‘max’ that holds our max_num_pages and a key ‘html’ which holds the HTML of our response.
To display our HTML list again on our page, we’ll need to use res.html. We also check if pages >= res.max to see if we need to hide our button, or if we did not reach the maximum amount of pages yet.
Using ajax in WordPress to load more posts or to filter posts in WordPress, it’s all fun and games as long as it actually works! If you can’t get it to work, there is no fun in making those things custom. And I had this when I tried to use this load-more script we just wrote, together with an offset.
The WordPress pagination simply does not work when you use an offset. The pagination query is completely broken and I don’t know why. But the entire script above is ready for the trash. I Googled around and there is literally no solution to make pagination work together with an offset.
How I ended up fixing this, is to create the offset myself as well… So in this example, I am skipping the 3 most recent posts, and want to paginate after that. To paginate the query without the latest 3 posts. Normally, I can simply use offset: 3 but with pagination, no way josé!
This is what I ended up doing instead:
$recent_publications = new WP_Query([
'post_type' => 'publications',
'posts_per_page' => 3,
'orderby' => 'date',
'order' => 'DESC',
'fields' => 'ids',
]);
$ajaxposts = new WP_Query([
'post_type' => 'publications',
'posts_per_page' => 6,
'orderby' => 'date',
'order' => 'DESC',
'paged' => $_POST['paged'],
'post__not_in' => $recent_publications->get_posts()
]);
I first create a query that pulls the most recent 3 posts. Afterward, I create our actual WP Query, and instead of using offset, I exclude the posts from our first query. In other words: Skip the most recent 3 posts, in the query where we want to use pagination. It’s the same as offset, but with additional steps.
If you found an easier solution to make pagination work with offset, please leave your solution in the comments!
If the pagination or the amount of posts returning from the query is not correct, try adding 'post_status' => 'publish' to your query. It might be that WordPress messes up the count because it’s also counting private or draft posts. Those are included in the count of the query but are not printed on the page.
I hope my article was clear and helpful for you to create your own ajax load more button. You can play with this to update our code that instead of clicking on the load more button, you will trigger our load-more function when we reach the bottom of the page. This is a way to create a simple infinite-scroll without any plugins.
Make sure to also check my other post on how to filter posts with ajax in WordPress. It’s using the same login as in this post. It can also help if you’re trying to make ajax filters together with ajax load more.
WordPress Filter without page reload using ajax is not a hard thing to do. Many developers will quickly install another plugin like facetwp or yith to do things like this. But it’s actually pretty simple, as WordPress has default ajax functionalities. For me, as a front-end developer, the hardest part is making the actual WP_Query if we’re extending this method for combined filters WooCommerce.
A more advanced ajax filter for Woocommerce will follow soon! Let’s first start with the basics. A live example of ajax filters in WordPress can be found on one of my live projects: https://eubac.org/publications/

Filtering posts, pages, or custom post types with ajax all works in the same way. I assume you have a basic knowledge of javascript and PHP for the syntax and basic WordPress to know how to make a query. You can filter posts and post types by category, tags, and custom taxonomies.
In this example, I will show you how we can filter our custom post type ‘projects’ by category, based on the category slug. There are many ways to query the posts. I’ll give a quick overview of all possible arguments so you can see which ones work best in your project.
cat: use category ID – intcategory_name: use category slug – stringcategory__and: use category IDs – arraycategory__in: use category IDs – arraycategory__not_in: use category IDs – arraytag: use tag slug – stringtag_id: use tag ID – inttag__and: use tag IDs – arraytag__in: use tag IDs – arraytag__not__in: use tag IDs – arraytag_slug__and: use tag slugs – arraytag_slug__in: use tag slugs – arrayauthor: use author ID – intauthor_name: use user_nicename, NOT name – stringauthor__in: use author IDs – arrayauthor__not_in: use author IDs – arrayTo get started, we first need a page that queries all our projects and displays them on that page. We also need to query over our categories, to be able to display all available categories. A live example of the filters can be found on the website of my clients – almost any website with a post-archive needs filters, am I right?
So how do we get started with WordPress filters? Let’s display our available categories first:
<?php $categories = get_categories(); ?>
<ul class="cat-list">
<li><a class="cat-list_item active" href="#!" data-slug="">All projects</a></li>
<?php foreach($categories as $category) : ?>
<li>
<a class="cat-list_item" href="#!" data-slug="<?= $category->slug; ?>">
<?= $category->name; ?>
</a>
</li>
<?php endforeach; ?>
</ul>
Notice that our first list item is not within the loop. We’ll use this to remove the filters and display all the posts again. In our anchor-tags you see href=”#!”. We need this because I want to use a-tags for the filters, but anchor tags require a href-tag to be a valid HTML element.
Also, note that I am using data-slug in my list-item links. We’ll need this later in our functions to filter on the category slug.
<?php
$projects = new WP_Query([
'post_type' => 'projecten',
'posts_per_page' => -1,
'order_by' => 'date',
'order' => 'desc',
]);
?>
<?php if($projects->have_posts()): ?>
<ul class="project-tiles">
<?php
while($projects->have_posts()) : $projects->the_post();
include('_components/project-list-item.php');
endwhile;
?>
</ul>
<?php wp_reset_postdata(); ?>
<?php endif; ?>
This is a basic WP_Query to pull in all our posts from post-type ‘projecten’. Make sure our single list items are coming from a separate PHP file. You can use include like I did, or use get_template_part(). Whatever you prefer.
The include file is just a single <li> item, so you can give it whatever markup you want. I won’t include it in this tutorial, because we’re going straight to the point: filtering
Feel free to reach out to me or leave a comment in case you want to see a full setup, that also explains the project-list-item.php file. For testing your code, you can add the_title(); in this file for now.
For me as a front-ender, obviously the most fun part! We’ll be running a filter function when we click on a category link we’ve made before. We’ll be doing 2 things:
EASY. But let’s not celebrate too early. This is only the JS part, we do need some custom PHP code later on in order to make this stuff work.
$('.cat-list_item').on('click', function() {
$('.cat-list_item').removeClass('active');
$(this).addClass('active');
$.ajax({
type: 'POST',
url: '/wp-admin/admin-ajax.php',
dataType: 'html',
data: {
action: 'filter_projects',
category: $(this).data('slug'),
},
success: function(res) {
$('.project-tiles').html(res);
}
})
});
This doesn’t look too complicated, does it? We click our category links and create a new $.ajax call. We will be posting our data to a custom function called ‘filter_projects’. We also need to post the slug we want to filter and we do that by passing our filter to our data ‘category’.
The AJAX URL is the default in WordPress: /wp-admin/admin-ajax.php
NOTE: If the relative URL /wp-admin/admin-ajax.php is not working for you and returns a 404 instead, try using the absolute URL
Just kidding. Ajax queries in WordPress with PHP all sounds like a nightmare, but it’s all fun and games! Because we are using the default /wp-admin/admin-ajax.php URL, we can write this function somewhere in the functions.php file:
function filter_projects() {
$catSlug = $_POST['category'];
$ajaxposts = new WP_Query([
'post_type' => 'projecten',
'posts_per_page' => -1,
'category_name' => $catSlug,
'orderby' => 'menu_order',
'order' => 'desc',
]);
$response = '';
if($ajaxposts->have_posts()) {
while($ajaxposts->have_posts()) : $ajaxposts->the_post();
$response .= get_template_part('templates/_components/project-list-item');
endwhile;
} else {
$response = 'empty';
}
echo $response;
exit;
}
add_action('wp_ajax_filter_projects', 'filter_projects');
add_action('wp_ajax_nopriv_filter_projects', 'filter_projects');
When hitting the ‘filter_projects’ function, we’ll be checking if we did POST our category-slug. If it’s an empty string, the query won’t filter and it will return all our posts. (we use it when we click the filter “show all projects”)
Next, we run our WP_Query again, but this time with an extra parameter for the category name. Ironically enough, it’s using the SLUG and not the name of the category. Afterward, we just loop over query results and add the template part as a string to our $results.
Don’t forget to register our function, so WordPress knows our ‘filter_projects’ exist. Otherwise, we’ll receive an error when we try to make our ajax call.
If you are using multiple post-types that are using the same taxonomies, we can dynamically pass our post_type to our ajax filter function as well. This way we can reuse our previous setup for all posts types on our page.
To be able to do this, we take our PHP list setup from the example above and add a new data attribute ‘data-type’ to also add the post type:
The following code snippets display only the parts that changed from the code examples from before. If something is not working correctly, make sure to use the code from above to set up all the triggers and functions.
<li>
<a class="cat-list_item" href="#!" data-slug="<?= $category->slug; ?>" data-type="projecten">
<?= $category->name; ?>
</a>
</li>
Our data-type can be dynamic as well of course if you’re using the same filter component on all pages. I’ve kept it static in my example for simplicity. Now you can create multiple lists for each post-type and change the data-type attribute to the post type you want to filter.
In our javascript function, we also add an additional parameter in our Ajax filter function:
$.ajax({
type: 'POST',
url: '/wp-admin/admin-ajax.php',
dataType: 'html',
data: {
action: 'filter_projects',
category: $(this).data('slug'),
type: $(this).data('type'),
},
success: function(res) {
$('.project-tiles').html(res);
}
});
And at last, we need to make sure our PHP code uses our dynamic post type argument to filter our post types. Update the PHP function code in functions.php to look like this:
function filter_projects() {
$postType = $_POST['type'];
$catSlug = $_POST['category'];
$ajaxposts = new WP_Query([
'post_type' => $postType,
'posts_per_page' => -1,
'category_name' => $catSlug,
'orderby' => 'menu_order',
'order' => 'desc',
]);
$response = '';
if($ajaxposts->have_posts()) {
while($ajaxposts->have_posts()) : $ajaxposts->the_post();
$response .= get_template_part('templates/_components/project-list-item');
endwhile;
} else {
$response = 'empty';
}
echo $response;
exit;
}
add_action('wp_ajax_filter_projects', 'filter_projects');
add_action('wp_ajax_nopriv_filter_projects', 'filter_projects');
When filtering your posts using a custom taxonomy instead of the regular tags or categories, we need to edit our query a little bit. The way we can filter on custom taxonomies is slightly different. We need to add a tax_query to our normal query.
a tax_query is an array, existing of arrays. This actually brings us fluently to creating an ajax filter that supports multiple filters at once. But let’s just start with displaying all posts for the selected custom taxonomy.
Our query will look like this:
$projects = new WP_Query([
'post_type' => 'projecten',
'posts_per_page' => -1,
'tax_query' => [
[
'taxonomy' => 'product_cat',
'field' => 'term_id',
'terms' => $termIds, // example of $termIds = [4,5]
'operator' => 'IN'
],
]
]);
Note that our taxonomy query is an array of arrays. $termIds is also an array, with all termIds I want to filter on. Thanks to the taxonomy query being its own argument, we can combine taxonomy filters together with other category or tag filters.

Let’s combine multiple filters at the same time! The picture shows example of how it works and will look. It’s somewhat similar to creating the regular filters we did above, but can quickly become a mess. So I’m going to seperate our ajax filters in a seperate filters.js file. The PHP part will still be in functions.php but you can place it in your own WordPress plugin folder if you’d like. I’m not going to cover creating WordPress Plugins, so my solution will be straight in functions.php 🙂
To get started on a filter like above, I created a custom sidebar with all my different filters in it:
<div class="filter--sidebar">
<input type="hidden" id="filters-category" />
<input type="hidden" id="filters-creators" />
<?php
// or use include_once('parts/filter-pricerange.php');
get_template_part('parts/filter','pricerange');
get_template_part('parts/filter','categories');
get_template_part('parts/filter','creators');
?>
</div>
Note the two hidden fields for our categories and creators. We will fill those up with javascript and then post those values to our ajax query. More on this later!
You can add every filter-part you want like this. Because I covered the categories above, I will cover creators first. This is a relationship field with the ACF Plugin.
Our parts/filter-creators.php file shows a list of all our creators/brands. This makes it possible for users to filter on the brand they like. This file simply loops over all our brands and shows them in a list:
<?php
$get_creators = new WP_Query([
'post_type' => 'creators',
'posts_per_page' => -1,
]);
if ($get_creators->have_posts()): ?>
<h4 class="filter-title"><?= _e('Creators','weichie'); ?></h4>
<ul class="list-filters">
<?php while ($get_creators->have_posts()):$get_creators->the_post(); ?>
<li>
<a href="javascript:;" class="filter-link" data-type="creators" data-id="<?= get_the_ID(); ?>">
<?= esc_html(get_the_title()); ?>
<span class="remove"><i class="fas fa-times"></i></span>
</a>
</li>
<?php endwhile; ?>
</ul>
<?php wp_reset_postdata(); ?>
<?php endif; ?>
So far so good? I don’t think anything special is going on in here. We create a new WP_Query for our ‘authors’ post type and loop over them. You do need to hide the span. remove the element with CSS. This one we will show only when someone has selected that filter.
Maybe it’s also interesting to show you how I’ve linked our creators to the products. I’m using the ACF Pro Plugin to create the fields and place them as a relationship field onto our products. ‘Creators’ is a custom post type on its own.

For each product in our store, I can select one or more brands that are ‘related to’ this product. So it would be nice to have if users could now filter our products based on this brand.
Next up: our filter.js file! You don’t have to, but if I like to keep things clear. The filter-file will contain all our js-related filter stuff. So if something breaks or we need to change or add something, it’s always easy to find.
You remember our hidden fields in our PHP filters? Now is the time we’re going to use them. When clicking on a creator, we’ll be putting the IDs of our selected brands in the input field.
filters.js :
$('.filter-link').on('click', function(e) {
e.preventDefault();
$(this).toggleClass('activeFilter');
editFilterInputs($('#filters-' + $(this).data('type')), $(this).data('id'));
filterProducts();
});
So for each filter-link we’re clicking on, we’ll toggle our ‘activeFilter’ class (to show/hide the remove icon on the filter), we’ll edit the values in the hidden input fields and we’ll be calling our filterProducts() function to actually filter our products.
To place our values in our hidden fields, we need to make sure we’re not adding a filter twice. Clicking on a filter will add the ID to our hidden field. Clicking on it again will remove the ID from the hidden input field:
function editFilterInputs(inputField, value) {
const currentFilters = inputField.val().split(',');
const newFilter = value.toString();
if (currentFilters.includes(newFilter)) {
const i = currentFilters.indexOf(newFilter);
currentFilters.splice(i, 1);
inputField.val(currentFilters);
} else {
inputField.val(inputField.val() + ',' + newFilter);
}
}
The editFilterInputs function takes an input field – the one where we want to place our filters. Our creator IDs need to go into the creator hidden input field of course. Then we check if the ID already exists in the input field or not. If so, we’ll remove the ID, otherwise we’ll add it.
Our input-field has a value of string. I’m converting the current value in our input field to an array to make it easier to check if the value already exists. If so, remove it, otherwise add it.
Now our main filterProducts() function:
function filterProducts() {
const catIds = $('#filters-category').val().split(',');
const creatorIds = $('#filters-creators').val().split(',');
$.ajax({
type: 'POST',
url: '/wp-admin/admin-ajax.php',
dataType: 'json',
data: {
action: 'filter_products',
catIds,
creatorIds,
},
success: function(res) {
$('#result-count').html(res.total);
$('#main-product-list').html(res.html);
},
error: function(err) {
console.error(err);
}
})
}
The JS part actually looks a lot like a single category/tag/taxonomy filter. But this one will be used for all our filters in the future. In this example, it will work for both creators and categories. You can add all other filters in exactly the same way.
Please note that I am again converting the hidden input fields to an array before posting it to our PHP script to actually make the query and return our response.
The PHP part is a bit different than usual. I don’t know if I am explaining any of this clear to you, but please bear with me. We’re almost there and I hope you can make it to work on your project as well!
Getting started in the PHP file, we’ll create our filter_products() filter, receive our $_POST value from the creators and categories and just start with our basic query (without filters) for now.
function filter_products() {
$catIds = $_POST['catIds'];
$creatorIds = $_POST['creatorIds'];
$args = [
'post_type' => 'product',
'posts_per_page' => -1,
'post_status' => 'publish',
'orderby' => 'date',
'order' => 'desc',
];
}
add_action('wp_ajax_filter_products', 'filter_products');
add_action('wp_ajax_nopriv_filter_products', 'filter_products');
Is this still going fine? We get the POST values and create an $args array with our basic query values. We are using a separate $args variable to make it easier to add our multiple filters to the query array.
Next, we’ll add our product categories to the $args array. This one uses the WordPress default ‘product_cat’ taxonomy to filter on a product category: add this part right below our previous $args. In the same filter_projects() function.
// Product Category
if (count($catIds) > 1) {
$args['tax_query'][] = [
'taxonomy' => 'product_cat',
'field' => 'term_id',
'terms' => $catIds,
'operator' => 'IN'
];
}
Also, nothing too crazy I think? It takes our $catIds from our $_POST from before. By using $args[‘tax_query’][] we add this array to the already existing $args array from before. We’re not overwriting anything, we’re adding a ‘tax_query’ array to our previous array.
We’ll be adding our creators’ filter to the array the same way. Only is Creators a Custom Post Type and not a Taxonomy. So instead of using tax_query we need to use meta_query for this field:
// Product creator - Every creator needs a seperate meta_query
if(count($creatorIds) > 1) {
$args['meta_query']['relation'] = 'OR';
foreach($creatorIds as $creator) :
if ($creator != '') :
$args['meta_query'][] = [
'key' => 'product_creator',
'value' => '"' . $creator . '"',
'compare' => 'LIKE',
];
endif;
endforeach;
}
Each creator needs its own [‘meta_query’] array. Only if there is a creator selected, we’ll be adding this filter to our $args.
Now our $args filter has the default query for our products, a tax_query for our categories, and a meta_query for our ACF Relationship queries.
Now it’s time for the main query. This one is exactly the same as the singular filters from above, but I changed the response a little bit so we receive our query total (to see how many products are in the filter) and then our $html result.
Place this code in the same filter_products() function, right below our previous $args functions for categories and custom post types:
if ( $ajaxproducts->have_posts() ) {
ob_start();
while ( $ajaxproducts->have_posts() ) : $ajaxproducts->the_post();
$response .= wc_get_template_part( 'content', 'product-dibbz' );
endwhile;
$output = ob_get_contents();
ob_end_clean();
} else {
echo __( 'No products found' );
}
$result = [
'total' => $counter,
'html' => $output,
];
echo json_encode($result);
wp_reset_postdata();
exit;
This is all we need to make ajax filters work in WordPress. Let me know if the ajax filters were easier than you thought or if you’re still having difficulties.
A more advanced, dynamic ajax filter for Woocommerce will follow somewhere next month. I still have some difficulties with filtering e-commerce products with ajax to make it super fast. The post will be ready when I’m done struggling. 😉
Edit 2021: I get a lot of reactions about doing a tutorial with ajax filters on default WordPress posts (the WordPress index page and category.php) – but then with Ajax. I want to write a tutorial on that topic as well, but it actually works the same way as this article. Except that WordPress handles the first post-query for us by default.
Please let me know if this tutorial escalated too quickly and you would prefer a more basic guide using the WordPress archive pages with ajax post filters.
This post will continue to finish the actual chat part on top of our previous React Firebase setup from part 1. It’s finally here!
Our Firebase chat app will use the real-time database from Firebase and not the Cloud Firestore. Why? Because the real-time database updates our app automatically for us, so we don’t need to do anything special to make it work!
You can find a working example of our app on chat.weichie.com (unavailable) and you can find the complete project on Github as well.

I created this app more than 2 years ago and in the meantime over 1000 people registered to test the chat app! Apologies to everyone who was waiting on part 2, but a recent comment on the Part 1 article made me realize that my blog has more traffic than I thought.
So here we go! Feel free to refresh my mind in the comments if I am talking nonsense in this post. I am no longer using React for my applications but switched it for Vuejs instead.
Only registered users will be able to post chat-messages in our application. Otherwise… We don’t know who said something. To make sure users are logged in, we’ll change our Router component like this:
// index.js
...
<Router>
<div className="app">
<nav className="main-nav">
{!this.state.user &&
<div>
<Link to="/login">Login</Link>
<Link to="/register">Register</Link>
</div>
}
{this.state.user &&
<a href="#!" onClick={this.logOutUser}>Logout</a>
}
</nav>
<Switch>
<Route path="/" exact render={() => <Home user={this.state.user}/>} />
<Route path="/login" exact component={Login} />
<Route path="/register" exact component={Register} />
<Route component={NoMatch} />
</Switch>
</div>
</Router>
...
We changed a few things in our index.js-file to check authenticated users. Let’s start with the navigation on top.
We create a navigation element main-nav with 2 navigation elements. One that will be displayed when our user is logged in, and another navigation that will be displayed when the user is logged out. So he can choose if he wants to log in with an existing account or register a new account (and talk with himself)
The other important thing we changed in our index.js file is that we swapped the {home} component with a function, that renders our component in-line. This way we’re able to pass our logged in user as a prop to our home component.
Our Home component is the home screen of our application. This screen will show you the chat-app when you are logged in, or the option to create your account if you are logged out.
First the setup: Now that our router passes our user-state to our Home component, we can display authentication-based elements in this component as well. Let’s see what it looks like:
// Home.js
import React from 'react';
import {Link} from 'react-router-dom'; <-- add this line
class Home extends React.Component{
render(){
return(
<div className="home--container">
<h1>Welcome to the chat!</h1>
{this.props.user &&
<div className="allow-chat">
We insert our chat-component later
</div>
}
{!this.props.user &&
<div className="disallow-chat">
<p><Link to="/login">Login</Link> or <Link to="/register">Register</Link> to start chatting!</p>
</div>
}
</div>
);
}
}
export default Home;
In our home render function, we added an if-statement to see whether or not our users are logged in. If so, we are allowed to show our chatbox. If not, we give them the option to log in or to create a new account.
Make sure to import {Link} at the top of our Home.js file.
The most important file! Apologies again if some of you waited so long for me to finally finish up Part 2 as well… a sincere apology from my end!
So Let’s dive right in and create a Chatbox.js file inside our Home folder. To clarify, this is what our folder structure inside /src/ looks like:
And then we’ll add the usual defaults for a new component:
import React from 'react';
class Chatbox extends React.Component{
render(){
return(
<div className="chatbox">
<ul className='chat-list'>
<li>Here we show our chat messages</li>
</ul>
</div>
);
}
}
export default Chatbox;
Nothing too crazy in here yet. Just a simple component that, for now, will return a list with 1 static element. Next: Add firebase! We will create a component-state into Chatbox.js where we will insert all the messages that we’re pulling from firebase.
So what do we need? A constructor for our state that will store the firebase messages in our app. And a call to firebase to get all the messages in our application. This function will be run when our Chatbox component is mounted. Here’s the setup code:
// Chatbox.js
...
class Chatbox extends React.Component{
constructor(props){
super(props);
this.state = {
chats: []
}
}
componentDidMount(){
console.log('Chatbox.js is mounted!');
}
render(){
...
}
}
We have a constructor with a state for our ‘chats’ and if we can see ‘Chatbox.js is mounted!’ in our console, we’re ready for the firebase integration.
The Firebase Realtime Database works with ‘refs’. Although it returns one huge JSON tree, refs will give us easy access to the data we need. Our chat app is still empty at the moment, so we need to add some test messages first before we can display our chat list.
To ease up development, it would also be nice if we could see our Chatbox component in our app. So let’s hook it up really quick:
// Home.js
import React from 'react';
...
import Chatbox from './Chatbox'; <-- Add this line
...
// Update our render method:
<h1>Welcome to the chat!</h1>
{this.props.user &&
<div className="allow-chat">
<Chatbox />
</div>
}
...
This adds the Chatbox component when our user is logged in so we can see what we’re doing. Let’s continue:
We can’t pull an empty list from Firebase. I mean… we can… but we won’t see anything. So head back to our Home.js component and we’ll write some logic to add messages to our database.
// Home.js
import React from 'react';
import firebase from '../../firebase'; <-- Add this line
import {Link} from 'react-router-dom';
class Home extends React.Component{
constructor(props){
super(props);
this.state = {
message: ''
}
}
handleChange = e => {
this.setState({[e.target.name]: e.target.value});
}
render() {
...
<div class="allow-chat">
<form className="send-chat" onSubmit={this.handleSubmit}>
<input type="text" name="message" id="message" value={this.state.message} onChange={this.handleChange} placeholder='Leave a message...' />
</form>
<Chatbox />
</div>
...
}
}
export default Home;
What’s happening? We created a state in our Home component and added a form in our ‘send-chat’ div. In React/Vue/Angular/… you are not allowed to have unbound forms. So our input-field has an onChange method that will keep the value in our input field in sync with the input field value in our state.
I already made you import firebase at the top of our file and gave our chat-form the onSubmit function, because we’re continuing our send-message logic right away:
// Home.js
...
handleSubmit = e => {
e.preventDefault();
if(this.state.message !== ''){
const chatRef = firebase.database().ref('test');
const chat = {
message: this.state.message,
user: this.props.user.displayName,
timestamp: new Date().getTime()
}
chatRef.push(chat);
this.setState({message: ''});
}
}
...
The handleSubmit function goes above our render() method. Like how we did the handleChange function. When submitting the form, we check if the message is empty. If so, we don’t do anything (otherwise people can push empty values to your database – talking from experience…)
If we have a value to push, we create a chatRef. This one will be a firebase database reference. Note that this can be anything we’d like. In my example I used ‘test’ as ref, create a chat message object and push it to our chatRef. Then we also update our state, so the message field get cleared once the message is submitted.
The ‘chat’ object we’re pushing to firebase looks like this:
When you hit submit, you should be able to see our ‘Test’ ref and our message in the Realtime database! Booyaa.

If the test is working, you can change the ref in the const chatRef = firebase.database().ref('test'); line from ‘test’ to whatever you want. As you can see in the image, I’ll be using ‘general’ in this example. But this can be anything you want – and you can change it on the fly! (if you want to make different chatrooms or something like that)
All righty, now that we are able to push data to our firebase database, we’re ready to pull them back into our app as well. Back in Chatbox.js we’ll complete our componentDidMount() function to pull our firebase data when our chatbox is loaded.
// Chatbox.js
import React from 'react';
import firebase from '../../firebase'; <-- Add this line
class Chatbox extends React.Component{
...
componentDidMount(){
const chatRef = firebase.database().ref('general');
chatRef.on('value', snapshot => {
const getChats = snapshot.val();
let ascChats = [];
for(let chat in getChats){
ascChats.push({
id: chat,
message: getChats[chat].message,
user: getChats[chat].user,
date: getChats[chat].timestamp
});
}
const chats = ascChats.reverse();
this.setState({chats});
});
}
render(){
...
}
}
export default Chatbox;
Ok, sooo. On componentDidMount() we get the Chat reference we created previously in our Home component. Make sure to use the same reference as where you’re posting your messages to 😉
That’s actually all there is to do! If we have a chatRef, we take the snapshot and store it in a variable. The snapshot is 1 object, containing all our messages at once.
I want to display the latest messages at the top, so I’m looping over my getChats, and push the data we need into a helperArray called ‘ascChats’. The create a new variable and set it to the reverse version of the regular ascChats array. This way the latest messages are stored at the top. Don’t forget to push the end result to our state! So we can use it in our component.
For the reversing of the array to display the latest messages at the top… I’m pretty sure firebase will have a built-in function for this. But hey… Now we’ve done some javascript array cardio today as well 🙂
Now that we have our messages in the state of our Chatbox, we can list them in our chatbox! Yaay.
Update the render method in Chatbox.js like this:
// Chatbox.js
...
render(){
return(
<div className="chatbox">
<ul className='chat-list'>
{this.state.chats.map(chat => {
const postDate = new Date(chat.date);
return(
<li key={chat.id}>
<em>{postDate.getDate() + '/' + (postDate.getMonth()+1)}</em>
<strong>{chat.user}:</strong>
{chat.message}
</li>
);
})}
</ul>
</div>
);
}
...
We loop over the chat messages in our state and display them in our “chat-list”. Pooof! Our chat app is alive, just like that!!
This should do the trick?! A fully functioning React Chat App linked to the Realtime Database in Firebase! Let me know if you got stuck somewhere or if something is not explained correctly. I’ll adjust my tutorial.
As I said before, I switched to using Vuejs instead of React. I’ll ad a link to a Vue-firebase setup as well in the related articles. Or, if you landed on this page and missed part 1 of the React Firebase setup, that one can be found as a related article as well.
Hope you enjoyed it and that my tutorial gave you some more insights!
Peace.
Let’s get started with Vue Firebase! I recently started a new job as freelance developer in a digital company and got to know more about VueJS. I took a break from React for now and will experiment more cool things with Vue from now on! This post is written with Vue 2.6.6 (CLI 3.3)
(more…)I want to start creating apps with React, and what better way to do this than with a real-time application that other people can use? Making ‘real’ stuff, gives me more motivation to start learning new things. I’ll be building a React Chat application with firebase and will blog along the way, to let you know how I did it and where I struggled. Hopefully it can help you getting started with React or Firebase as well!
(more…)